I found a piece of scrap copper pipe and decided to make a ring out of it.
Note: This article has also been posted on the NineWaysToLife blog. All the media included is personal. I am a member of PS:One and made this project on its premises.
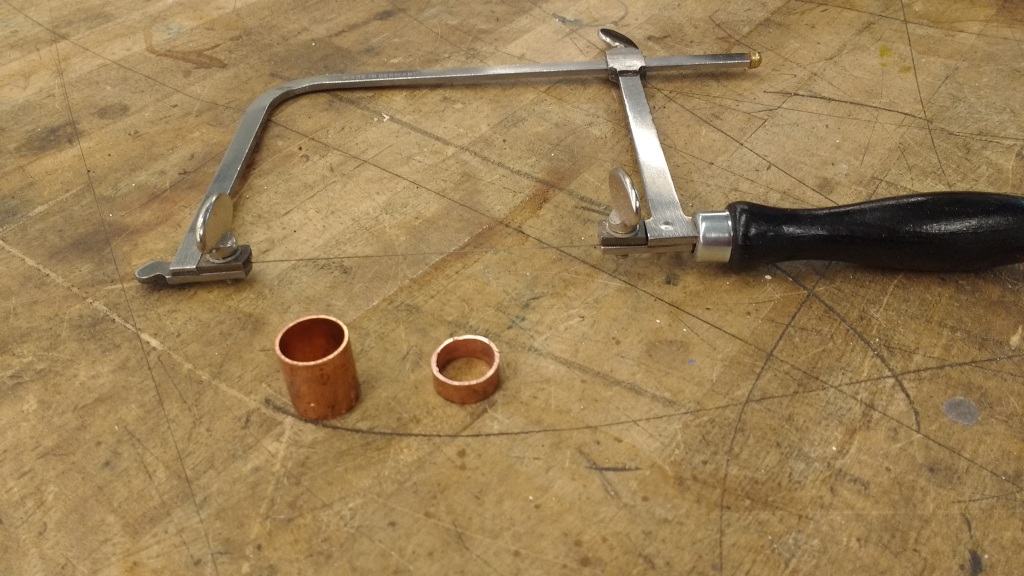
I sawed the copper pipe into a width that I thought would work well for a ring. Don’t forget that the ring will widen a bit when you will hammer it out later.
I used a file and some rough-grit sandpaper on the sawed edge of the ring in order to ensure that the edge was straight.

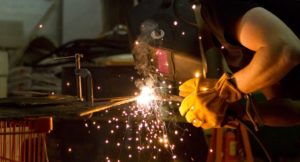
I then performed the annealing process with an acetylene torch. Heat the copper up until it is cherry-red-hot. Immediately quench the red-hot copper in a container of water. The sooner it is quenched the better.
The annealing process is an important step and changes the molecular structure of the copper. This change reduces the hardness of the copper and causes it to be more easily worked. It also reduces the chances for the metal to crack while being worked upon.
The softening of the metal’s crystalline structure by annealing is not reversed by time or temperature but is only reversed by working on the metal. This reverting of the metal back to its original state due to the stresses placed upon it by the work you perform is called “work hardening”.
Due to the work hardening (caused by the hammering, as will be seen below), I needed to anneal an additional time during my crafting process.

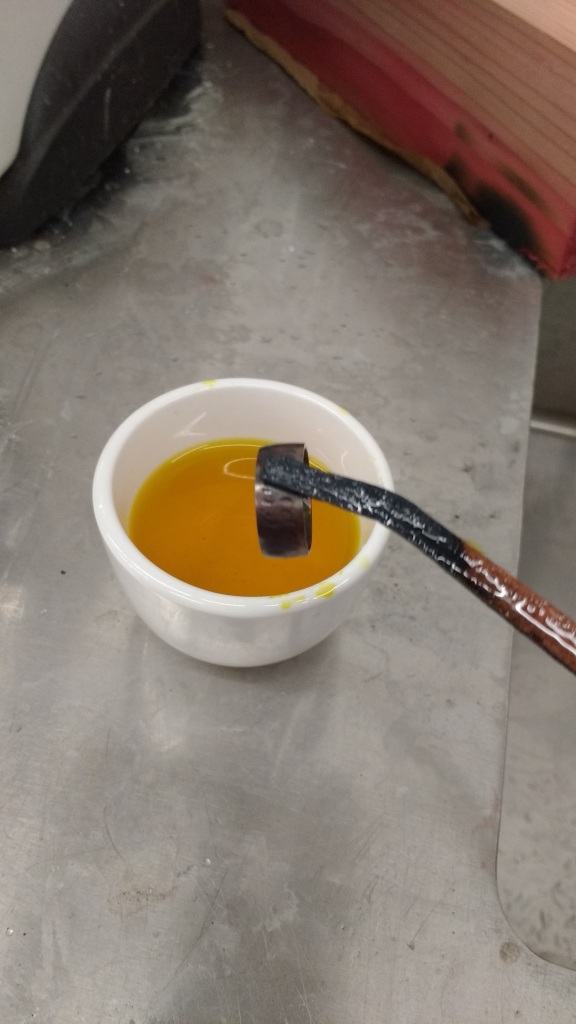
The next step in the process directly after annealing is “pickling”. The “Pickle” is an acid bath that removes the layer of copper oxide and that forms on the copper ring from the heat during the annealing process.
Fun Science Fact: No ferrous metals are allowed in the pickle as that reverses the stripping effect that the pickle has on the copper that you placed in it. Allowing steel or iron into the pickle will cause the copper molecules to bind to whatever you later place in the pickle, instead of removing the stains or impurities. This can be very frustrating, especially for people working with non-copper metals such as silver. Nobody wants a copper-covered piece of silver!
Note: On my first unsupervised pickling I made a mistake and used a pair of steel tongs, that someone had left near the pickle area, to remove my ring from the pickle. That mistake required me to neutralize the acid in the pickle to a pH level of 7 (neither acid nor base) by adding baking soda to the acid bath until it stopped reacting and then flushing it down the sink. I then made a new pickle, much to the delight of my fellow craftsmen, since that obviated them doing the work themselves (I have a hunch that someone planted that pair of tongs to get me to change the pickle… I’m just kidding, I was happy to learn!).
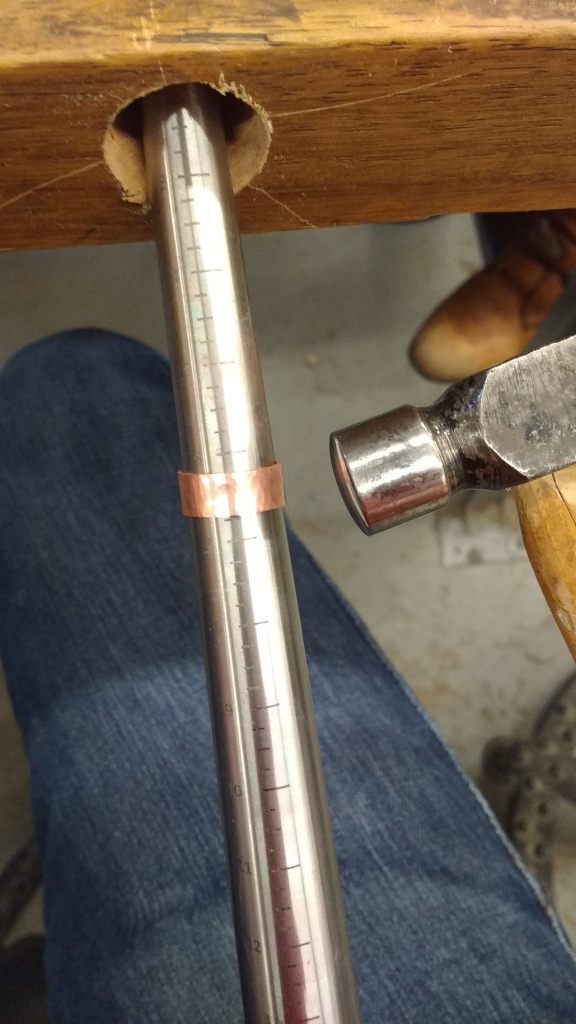
Now that the metal was nicely softened up by the annealing process it was time to work it. I measured my finger size on our ring sizer and determined that my pinky was a size 6.5 – 7. Since the original size of the copper ring was about a 4, I needed to expand it. I expanded the ring by using a hammer (with a shiny head surface since shiny heads transfer their shine to the object being hit, in this case, my ring. Scratched up heads transfer those scratches to the object which is a good reason to be careful with your jewelry hammers.) and a ring mandrel (a tapered piece of metal that has ring sizes marked on the side). I beat the ring until it reached the size that I required, remembering to flip the ring every once in a while in order to achieve a uniform spread. Remember, as mentioned above, the metal will thin and spread a little during this step of the process.
The shiny head on my hammer created this beautiful beaten-metal pattern on the ring which I really enjoyed. I hope to use that gorgeous pattern in further pieces.

Now, most of the difficult work has been accomplished and all that is left is the embellishment and design. I experimented with a piece of scrap copper (above) and a selection of chasing punches to find a pattern I enjoyed. (Note the chasing hammer and its dirty and scratched head in stark contrast to my earlier admonition to keep the heads of jewelry hammers smooth and shiny. Chasing hammers are the one exception to that rule as they are used to hammer on metal tools and utensils like chasing punches and dapping punches and never comes in direct contact with the actual metal being worked on.)
I found this pattern to be one that I enjoyed and hammered it into my ring while it was seated on the previously mentioned ring mandrel.

I then took the nearly finished ring and sanded the edges and inside with fine-grit sandpaper.
(Notice how the marks from the chasing punches are barely noticeable? Let’s move on to the next and final step in this process in order to remedy that.)
I then submerged the ring in a solution of hot water and liver of sulfur (and no, that is not a witches brew, rather a chemical mixture). This darkens the metal and adds a patina. I can choose to what extent the metal darkens by how long I keep the ring immersed in the liver of sulfur and how much I buff it (Scotch-Brite is the preferred tool for buffing).

Ta Da! The One Ring has been reforged! Now, all must tremble befor…. I mean, how neat is this ring that I made!? Now, you can make one too! (With access to high-powered heating tools, specialized jewelry-making equipment, chemicals with funny sounding names, and an awesome Pandora playlist, that is.)
Note: Notice the impressions made by the chasing punch are now much more vivid. That is due to the darkening of the metal by the liver of sulfur and the subsequent removal of much of it from the surface of the ring, but not from within the impressions themselves. This creates a lighter/darker effect which gives the impressions much more depth, perspective, and a greater contrast.
How did you enjoy this project? What did you learn from it? Has it inspired you to go out and make something? Please let me know in the comments below.
Note: A special thank you goes to Aushra Abouzeid for painstakingly stepping me through this project and for her wonderful patience in explaining how not to blow myself up with the acetylene torch as well as how to refresh the pickle (which I managed to ruin almost immediately after her back was turned, obviously).
-Baka