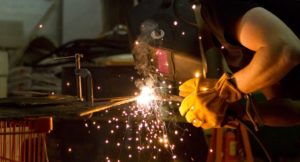
When I took over the Pumping Station: One wood shop (a little more than 2 years ago), I started making cutting boards as my metric on how functional the shop is. I reasoned that it’s an excellent entry level project, and most of the users of the shop would be people with no woodworking experience. The first boards I made at the space were pretty good, but every step was a chore. The jointer could never stay sharp for more than a month, the planer required weekly maintenance, dust collection was a hassle, and it took 10 minutes of setup to do jobs that should take only seconds. Well, little by little, training, equipment upgrades and accumulation, shop days, and community has made the shop much easier and safer to use. My most recent cutting board demonstrates what the shop is capable of.
Last year, one of my favorite coworkers invited me to her wedding, and I decided that I’d make her something special. After discovering the color scheme in her kitchen, I chose padauk, purpleheart, and cherry and made a design in a free cutting board design program.
To prevent the wood from warping while in service, I milled the wood square (rectangular, really, but it’s woodworking jargon) and let it dry for two weeks in the shop.
As expected, the boards warped again as they dried. I milled them again and two weeks later, they were still square, so they were ready to glue up. After the initial glue up, I had a board that looked like the top board in the design program. I planed down one side of the glued-up board with handplanes and then ran it through the planer the board was flat. At that point, I set up the tablesaw sled to cut the board into $1 \frac{5}{16}$ inch wide strips. I created the pattern by flipping every other strip.
After cutting the edge-joined board into strips, I glued up those strips and gave my board to a friend who ran the board through his 40 inch drum sander, to flatten down the glued up strips. My target thickness was $1 \frac{1}{4}$ inches, so I was thrilled with the $1.227$ inches that I achieved. At that point, I used a handplane to clean up the edges, and took an obligatory picture of my handplane with the produced shavings.
After getting the board milled to the desired dimensions, I set up the router table to cut handholds. After the handholds were cut, it was time to sand. And sand. And sand. And then sand a little bit more. After about 10 hours of sanding, I decided that I was going to get an angle grinder style rotary sander and handle that work in maybe an hour for all future boards. When I was content with the smoothness of the board, I soaked the board in mineral oil overnight, to seal the board against water. At the end of the soak, I wiped away as much mineral oil as I could, although the board kept bleeding mineral oil for about a day. At that point, I used a mixture of mineral oil and beeswax to seal the board and create the beautiful finish that I achieved. I applied the mixture, waited for it to haze (I waited about 90 minutes), and then wiped as much away as I could. Then I sanded using waterproof 1000 grit paper, which buffed the finish and filled in any potential gaps. Then I used a polisher to polish the board until I achieved a glassy finish. Project complete.


