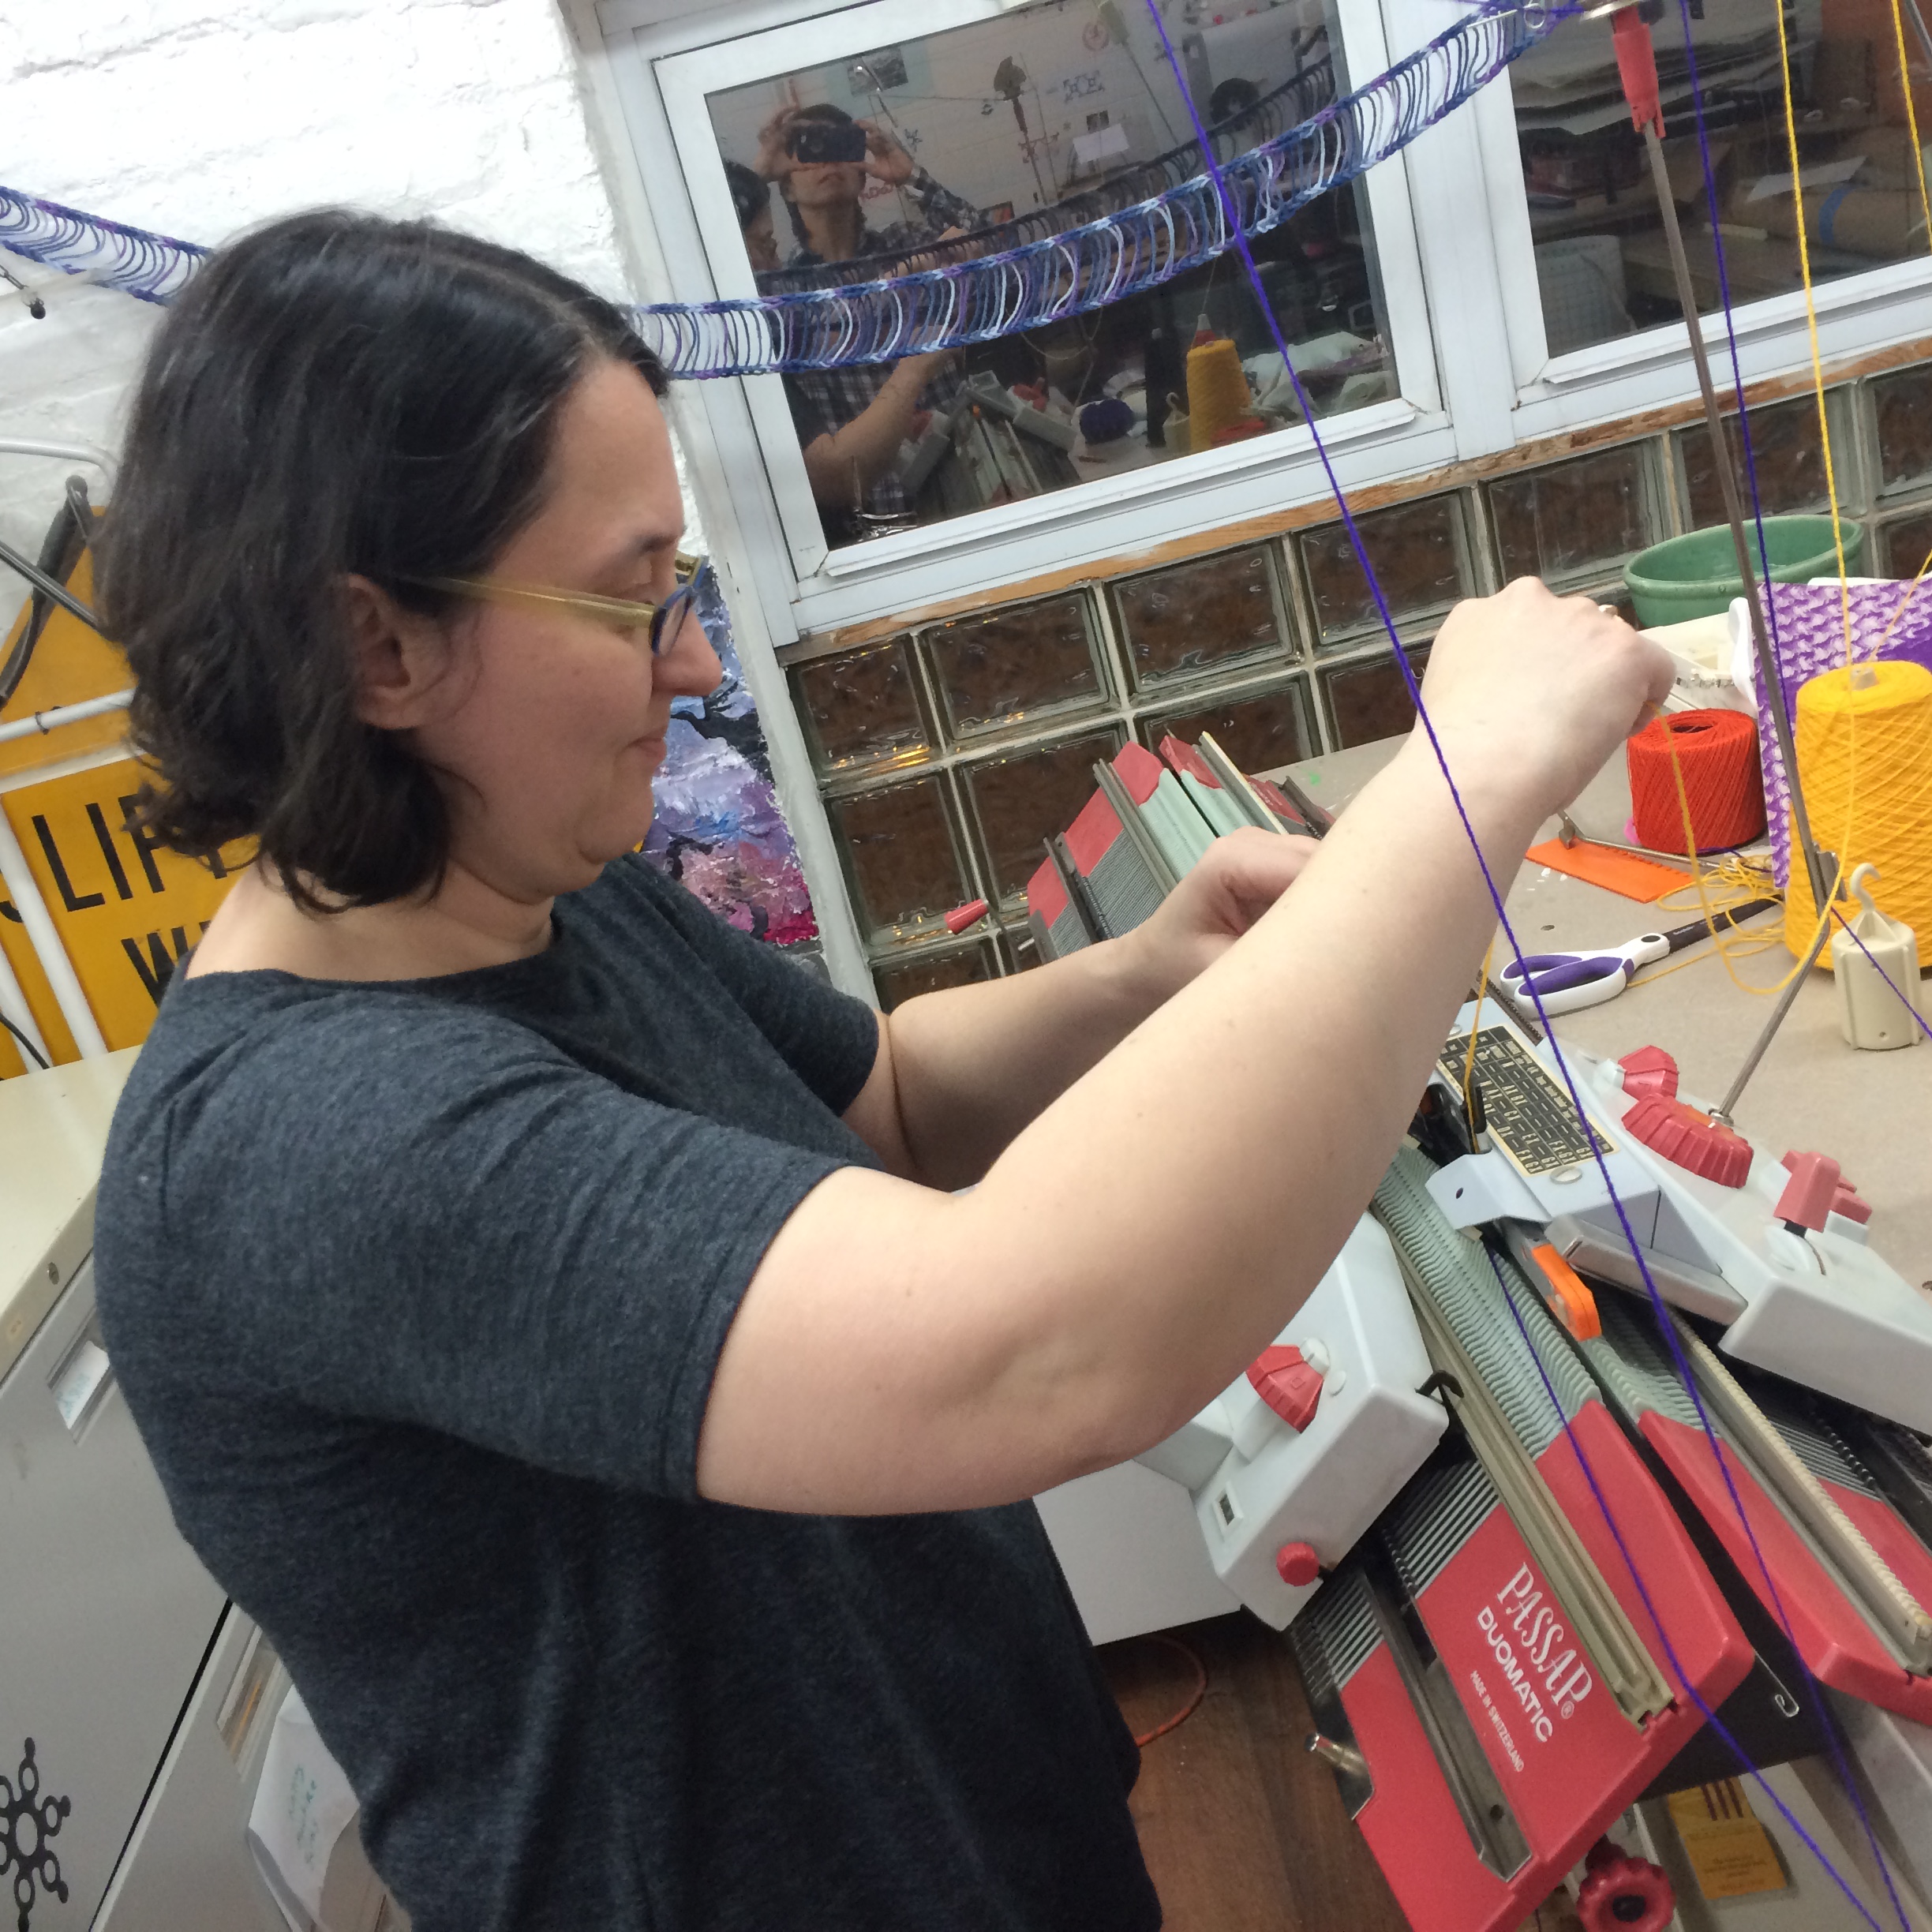

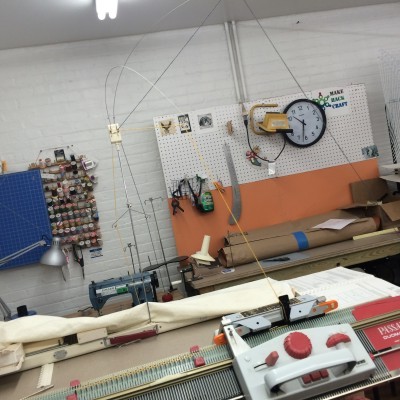
The Passap is officially working!
(Huzzah!)
Last night we tested settings that work with the fingering weight Tamm 3ply coned yarn. And we figured out how to knit from cones (no cake winding required)!
Setting up the machine:
Beds needs to be at “full pitch”. This means the combs of the two beds are lined up opposite each other. To do that, turn the crank handle at the lower left of the machine so the handle is “up”, at the top of its rotation.

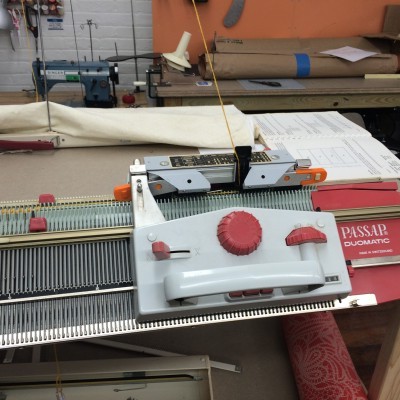
Park the carriage (“Lock” in Passap lingo) on the right. For both locks: set the tension dial to 3. There’s a large lever marked N-X. Flip it to N (“normal”). Insert the orange strippers.
Needles: for this yarn, use Every Other Needle on both beds, but stagger them. For example, if front bed uses needles 1, 3, 5, 7, back bed uses needles 2, 4, 6, 8. Farthest needle on left should be on front bed. Farthest needle on right should be on back bed.
Place the 4 “edge springs” on the end needles of both beds.
We’re not using the needle pushers. Make sure those are all parked safely behind the retention bar.
Tension Mast: Skip the Passap tension mast. We used the Brother 230’s mast, parked on the opposite side of the Passap table. Turn the Brother mast around 180 degrees so it faces the Passap. Put the cone yarn on the floor in front of the Brother and feed it through the mast normally. Feed the yarn through the Passap’s black plastic yarn eyelet that plugs into the carriage.
Drop the yarn through the beds, to the right of the carriage. Catch it under the bed and hold it with one hand.
Run the carriage from right to left. Now you can let go of the yarn end, but it needs a very small weight on it. A regular clothespin would work. I couldn’t find one so I tied it to a pen.
Change the lock settings: there’s a dial with letters A-G on it. Turn it til it says “C”. Flip the N-X lever to “X”. Now the machine will recognize the “x” variable= what’s on that dial. Note: you can only turn the dial when the lever is on “N”.
This would be the point where you would add a cast-on comb, if the yarn needed it. I’ll save the details of that for a later post.
Knit two rows: left to right, right to left.
Change both lock levers back to N.
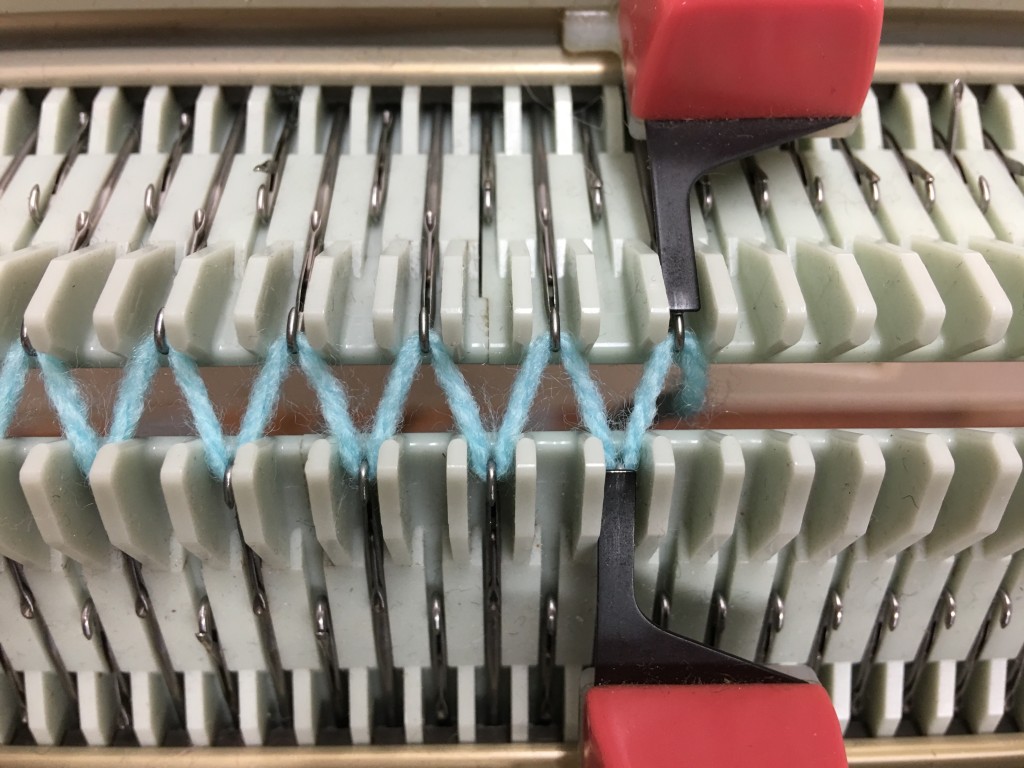
Knit 1 row. Congrats! You’ve just completed a closed-edge cast-on.
Keeping knitting with both locks set to N (that’s notated “N-N”).
Or… you can experiment with different cam settings for different stitches.
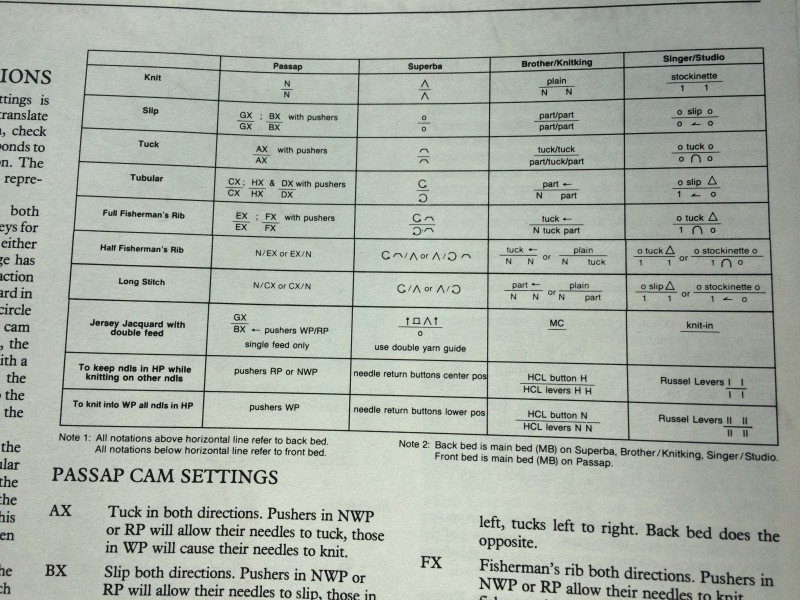
Page 13 of “A Machine Knitter’s Guide to Fabric” details these settings (the book lives in the bin under the km table).
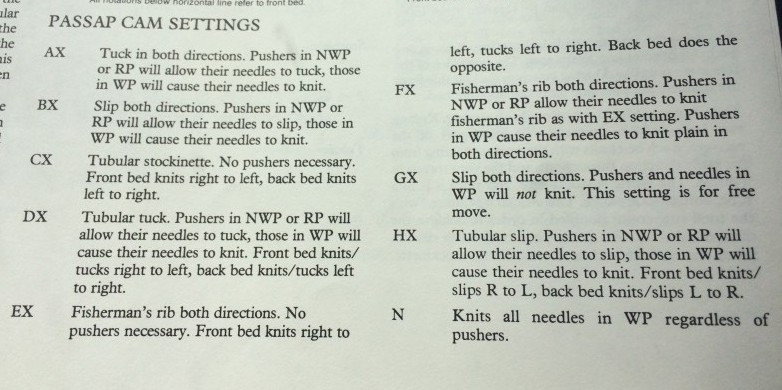
If you’re already certified on the Brother, check out p. 11-16 of “Machine Knitter’s Guide”. Susanna Lewis lists the Brother/Passap parallels, explains the settings, and gives a useful overview of basic stitch patterns.
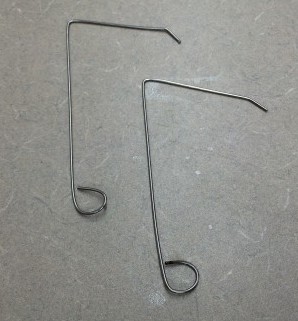
In theory, you should be able to knit on the Passap without using weights. (“In theory, Communism works”…) We found adding weights on the ends helps. So Aushra grabbed some wire and bent us a mighty fine pair of custom “7-wires”. Hook these on the left and right ends of the knitting and add a small weight (claw weights can work).
FYI:
- If you add the 7-wires or a cast on comb, make sure wire is pushed down far enough that it does not get in the way of the strippers passing over.
- The left side seemed especially prone to “loops” caused by slack yarn when the carriage changed direction from left to right.
- We had success with fisherman’s rib (EX-EX). However, a cast-on comb becomes more necessary when doing tuck stitch patterns like this.
- The spare set of carriages we received with the machine are designed to work with an automatic color changer but we don’t have the dock or eyelets that go with it.
Wishlist:
- Blue strippers. I hear these are for thicker yarns. They might alleviate the need for adding weights.
- Cast-on comb
- Color changer accessory
- More weights