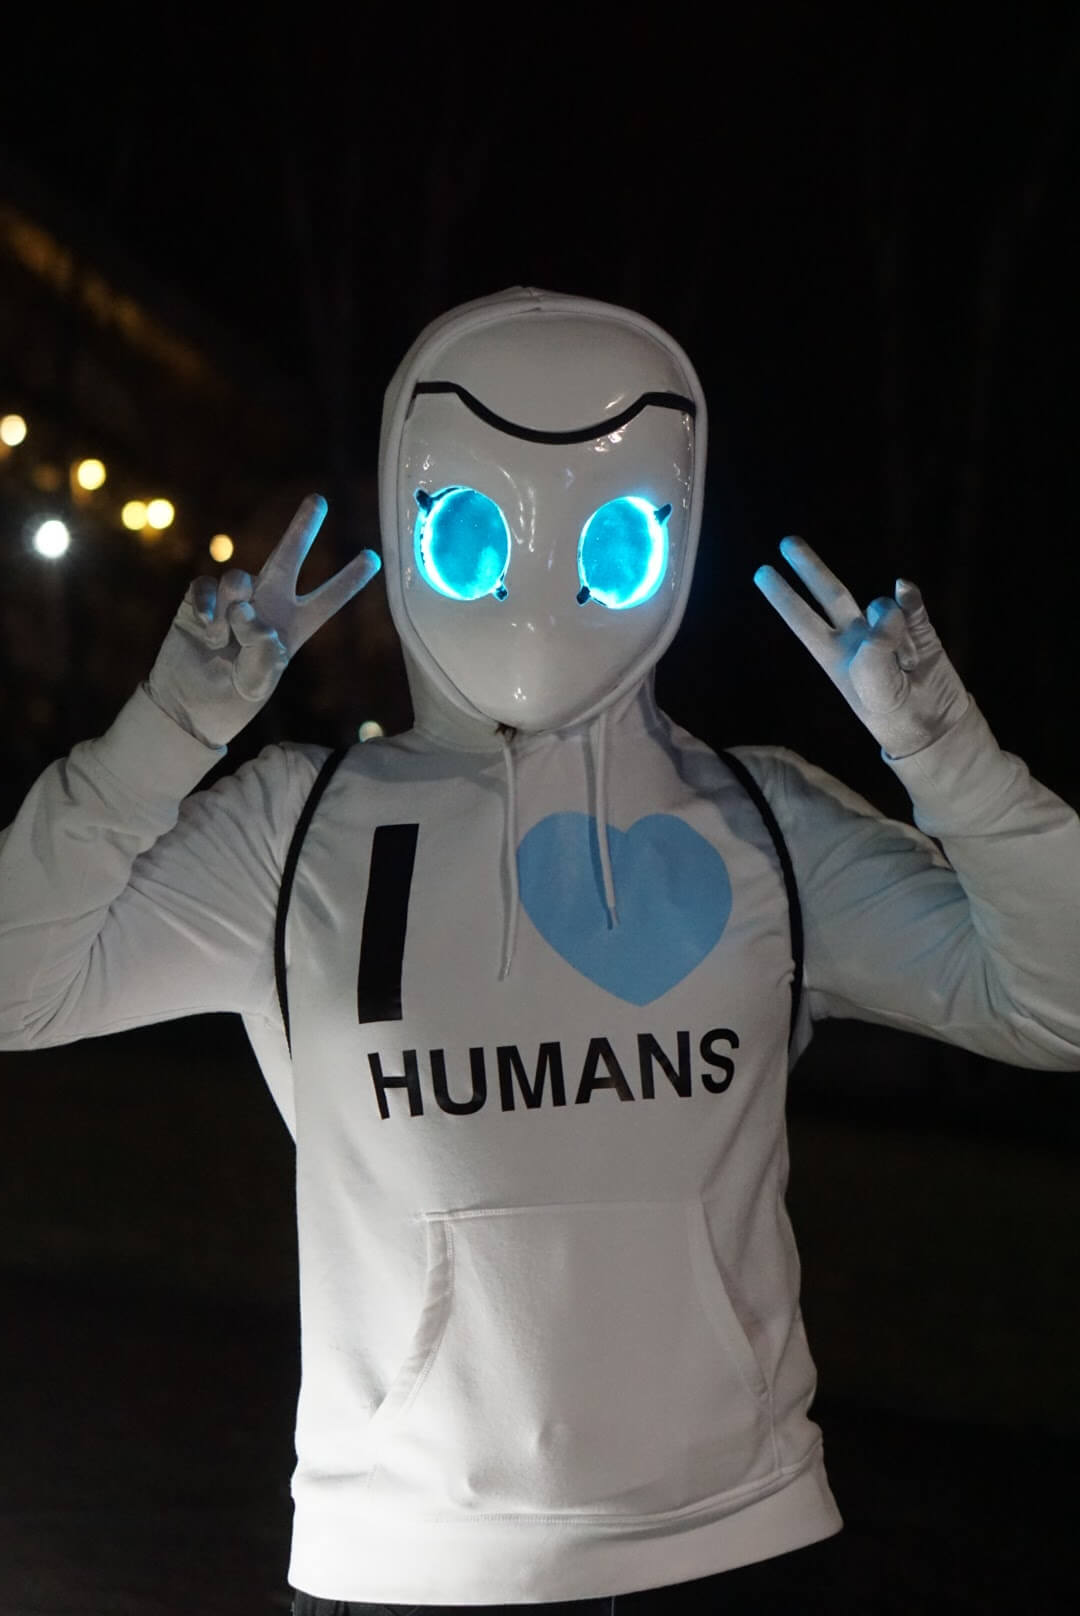
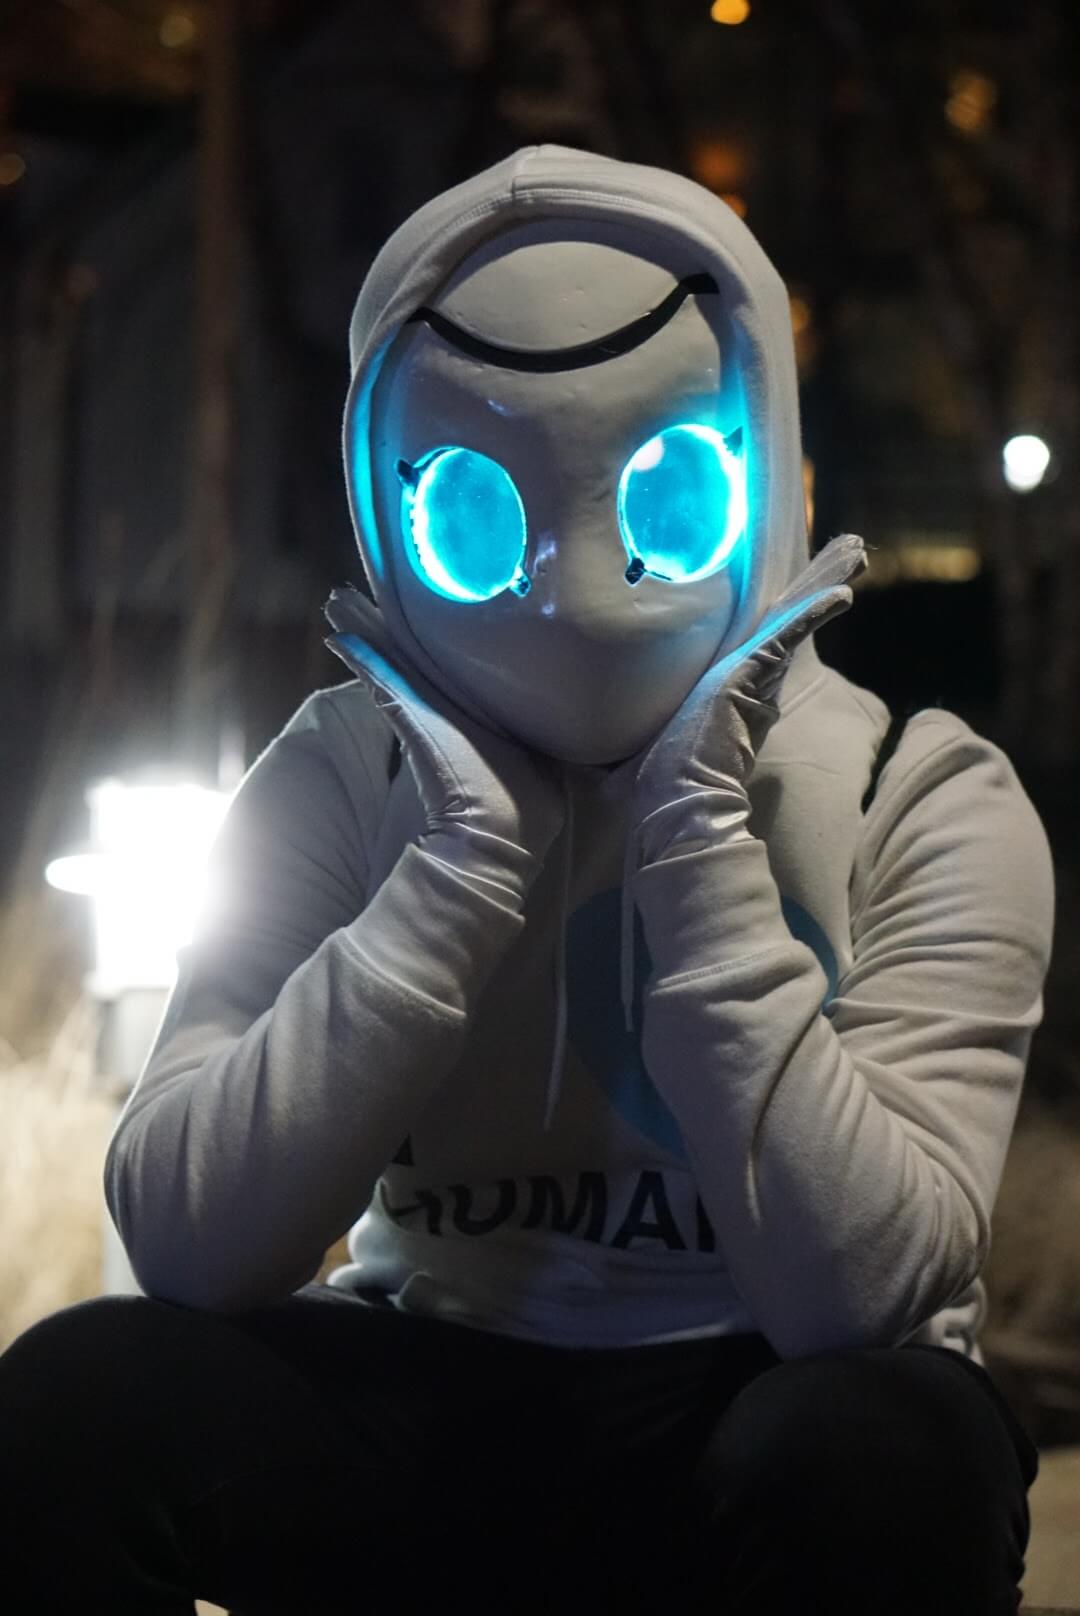
After months of work, hours of troubleshooting 3D printers and lasers, as well as a lot of patience, I’m proud to present my completed cosplay mask of gynoid Drossel von Flügel. My friend Jaina helped me take pictures at Katsucon last weekend in National Harbor. (Yes, the same convention center, unfortunately)
Note: almost all images can be clicked for full size.
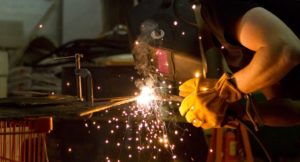
I have received no shortage of help from various people. The CNC department at Pumping Station: One has been great at supporting those who want to make things. Twitter user @ByNEET released a full model of Drossel which my friend Faraday (she does 3D work! fortunafaradaze at gmail dot com) helped disassemble for conversion into 3d print friendly STL files. My friends who spent countless late nights with me while I worked on this project. My mom, who was very helpful in assembling the mounts to hold it on my head at the last minute. My friend Amir, who introduced me to Pumping Station: One which has made a huge impact on me. Lastly, the PS1 community itself, for maintaining such a wonderful place to create and share as a community.
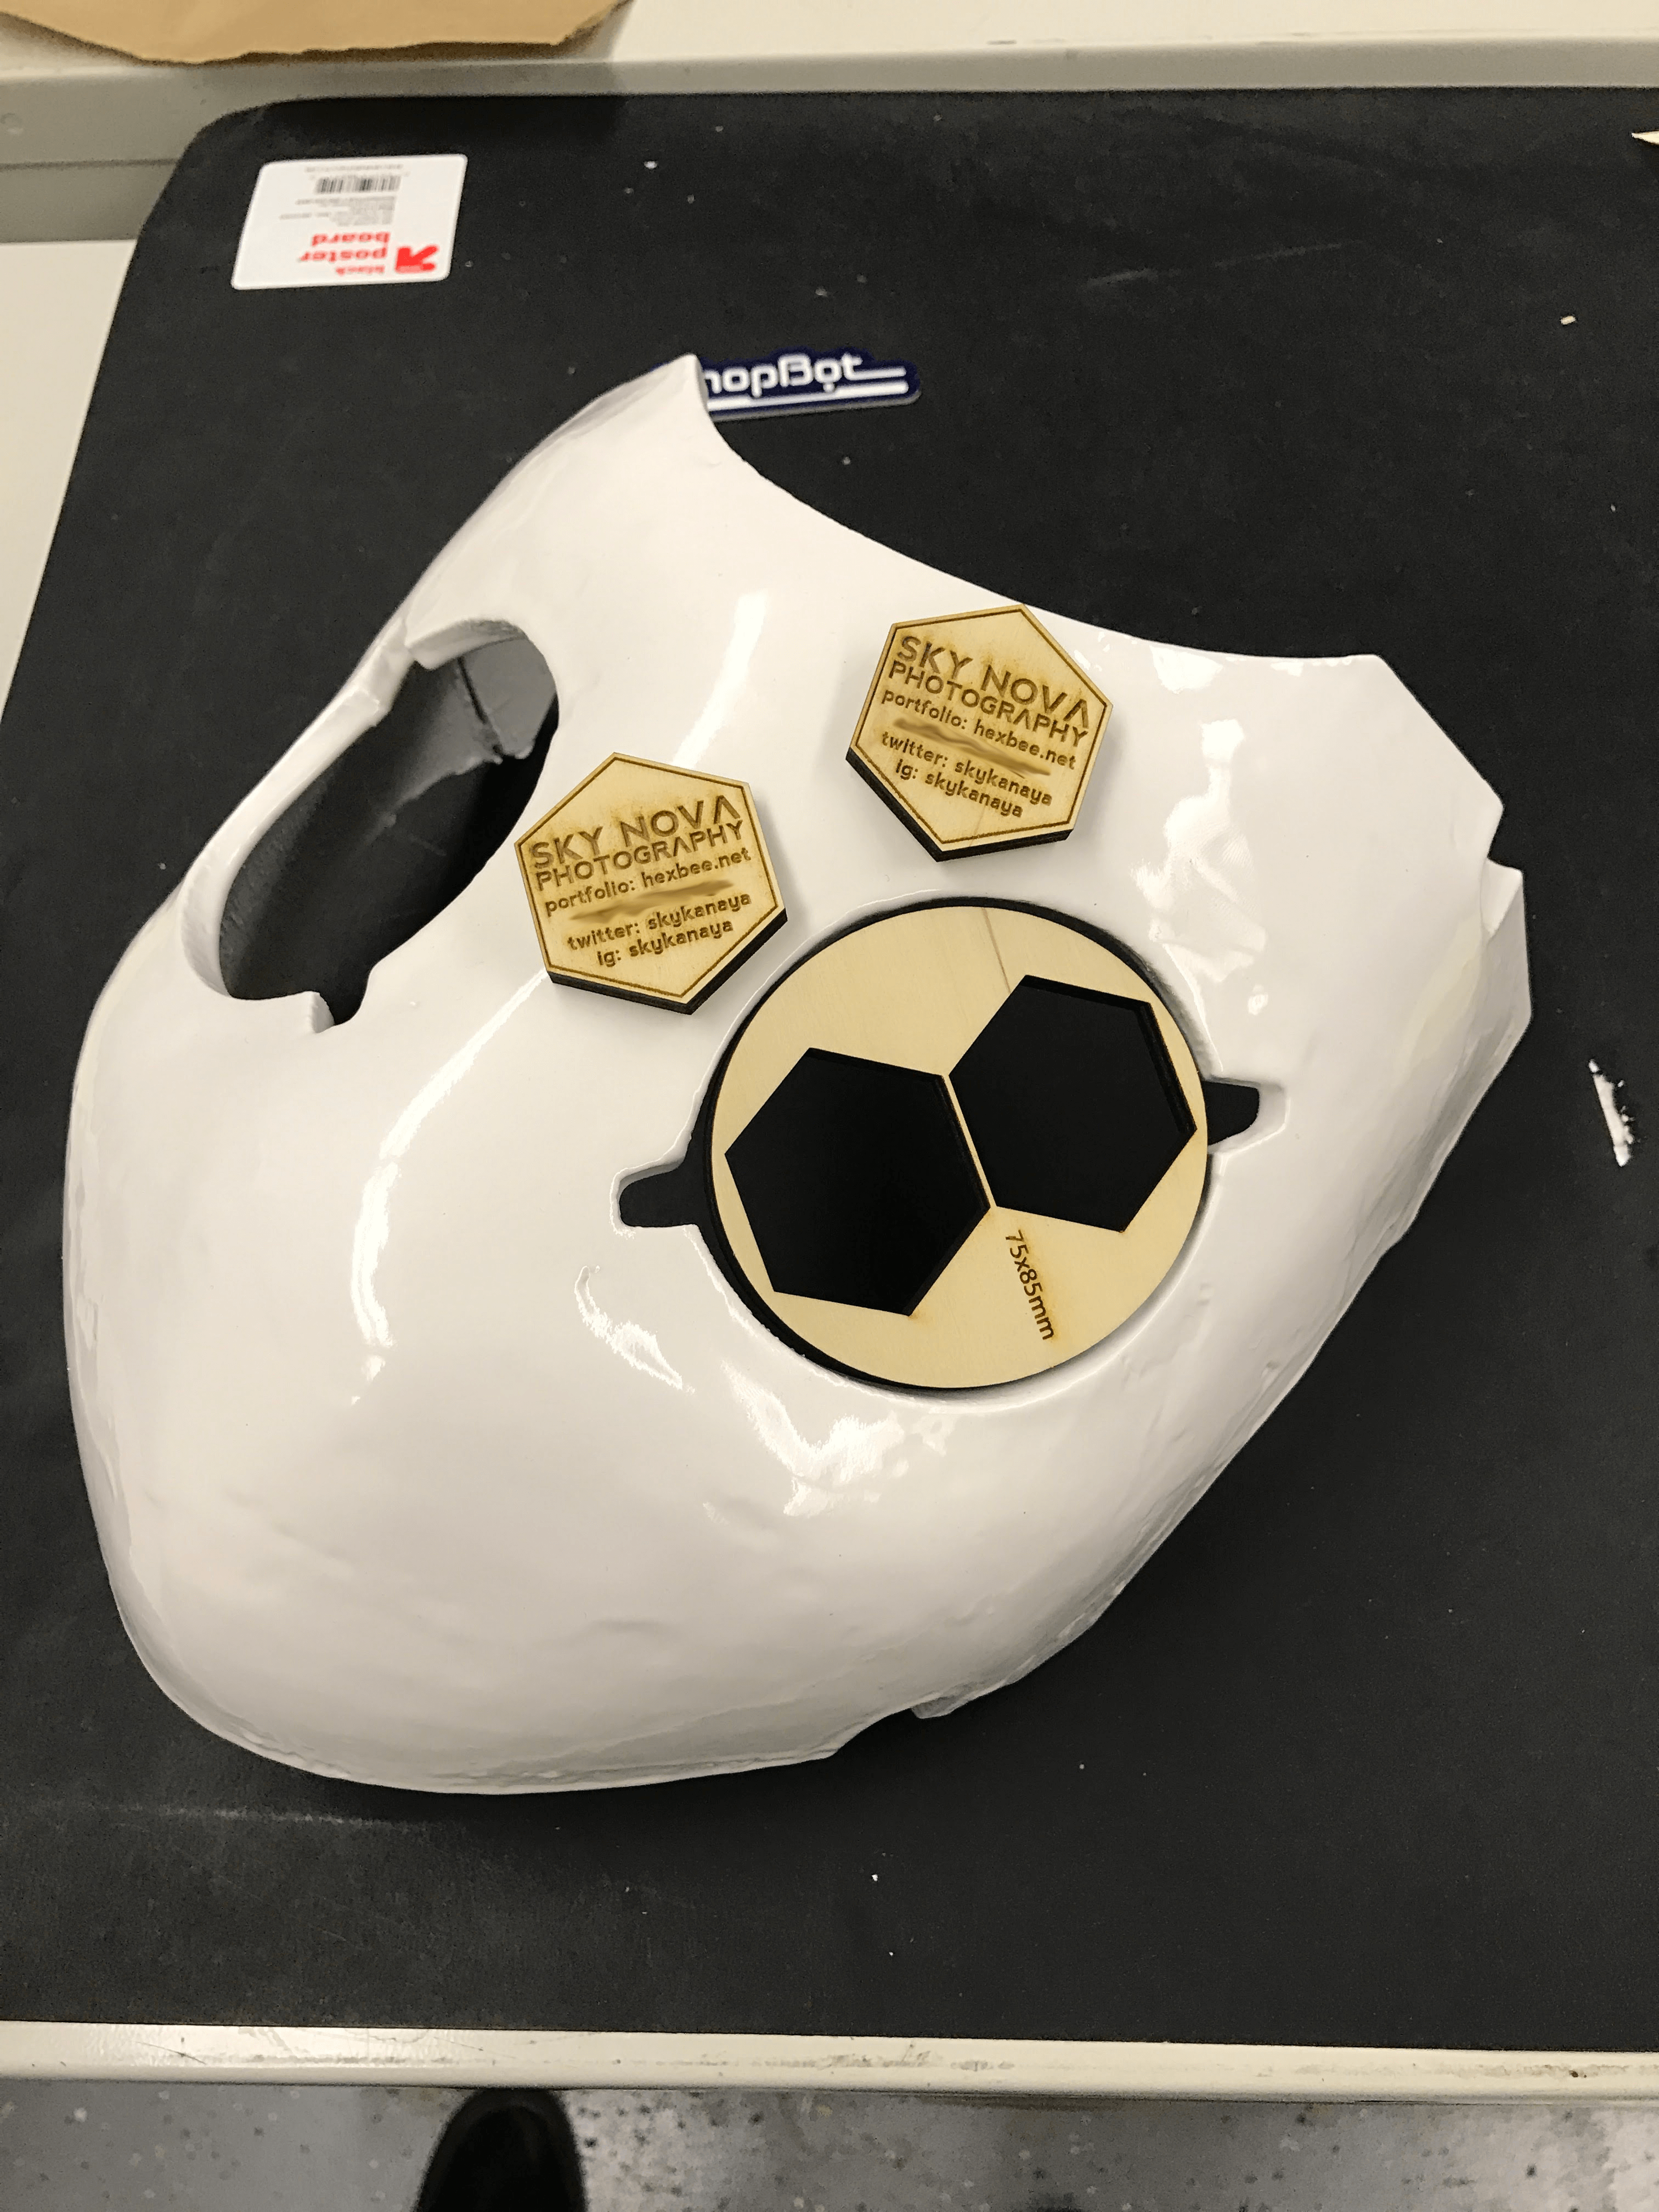
Below the read-more is a fairly detailed explanation on how I created the mask and what tools I used for those who are interested in pursing similar projects. Feel free to contact me (Skylar) with questions at SKY at TUNA dot SH or find me at the space! I also have a (photography) website, http://hexbee.net.
Click the read more below!
A little backstory:
Before I joined PS1, I often went to conventions to take photography of cosplayers. It was always interesting to see all the different methods people used to create cosplays, from simple costumes to full on exoskeleton suits of armor. I had always wanted to cosplay, but a lack of time and the daunting prospect of being on display caused the idea to be put on the back-burner.
Of course, until I found Pumping Station: One.
The first day I stepped into the space, I saw the potential to create many cool things. On the top of my priority list? COSPLAY. The idea to cosplay Drossel stemmed largely from my interest in robots and science fiction.
About Drossel:
Drossel herself is from an obscure series of shorts produced by Disney Japan. She’s a gynoid in a future where it’s implied she is the last of her kind in a war against humanity, a war she has forgotten the reasoning behind (or just doesn’t care). Despite being 4000 years old, she’s pretty quirky and just wants to get along with humans. Of course, for the sake of the shorts, this results in antics. Interestingly, despite the show being made in Japan, Drossel’s name and model implies she is of German origins. I plan to add the correct German decals with vinyl in a future version of the cosplay.
Now for the actual information on the cosplay:
This cosplay was made with many tools and from many materials. There have actually been 4 versions of the mask created since I started working on this project.
- Version 1 was made of thermoformed acrylic shaped on a wooden laser cut base.
- Version 2 was 3D printed in ABS and turned out decently despite having trouble with printing consistency. I planned to smooth it using Bondo, but applied way too much to the mask. Sanding it down proved to be very difficult. I may use this version for decorative purposes in the future due to its weight.
- Version 3 was 3D printed in PLA and turned out much smoother and consistent than the ABS. The mask from this version was actually damaged when attempting to fiberglass it. In retrospect, the attempt at fiberglass was unnecessary. Try, try again.
- Version 4 was an attempt to print another PLA based mask, but some of the parts got damaged when gluing them together. Aligning the parts is quite difficult since there isn’t a good place to clamp them together.
- Version 3.5 was the actual final mask in this post. I actually went into my garage on a very cold day, and in a last ditch effort to finish this, I actually just ripped the fiberglass off version 3. And to my surprise (although it really wasn’t applied properly) the fiberglass came off cleanly. Aside from some uneven fiberglass resin on the edges, the mask was basically intact.
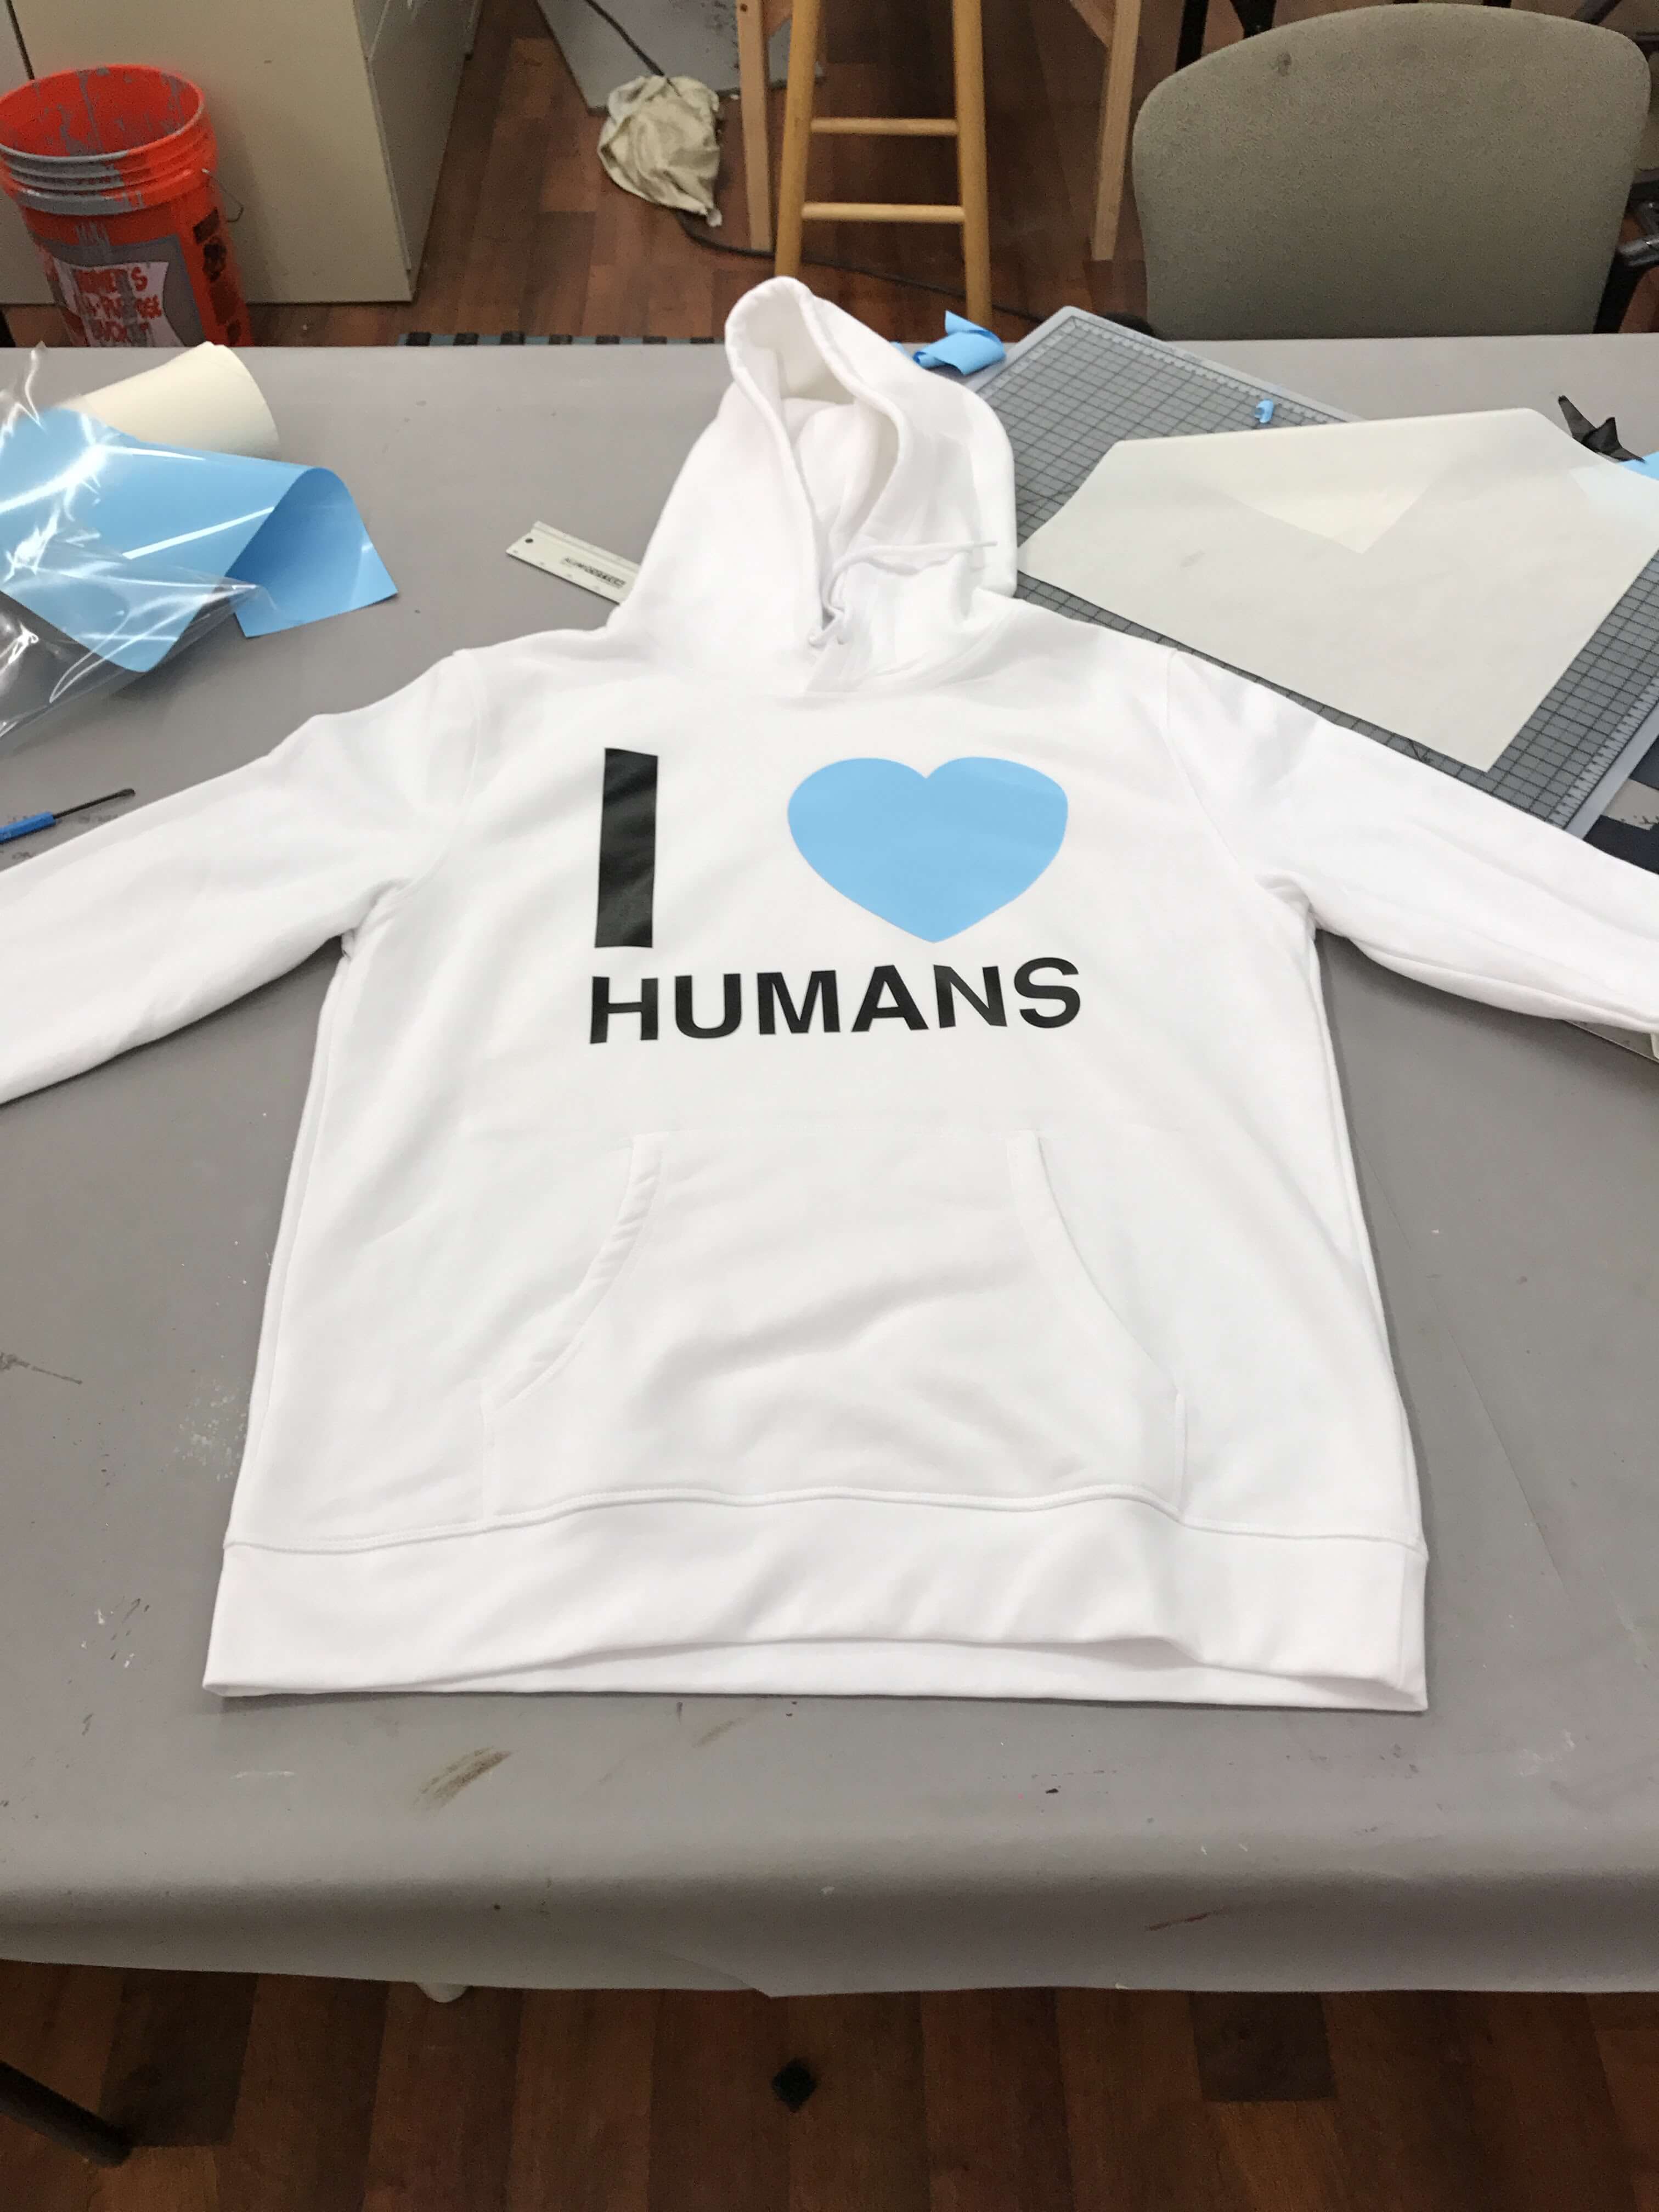
The hoodie and other elements:
The hoodie was made using heat transfer film with the vinyl cutter and the heat press. Under the mask I wore a MorphSuit black mask so that I could see out but nobody could see in. Decent visibility indoors and in daylight. However, it had pretty bad visibility outside at night. I also used white silk opera gloves for the hands. There were supposed to be black finger-less tactical gloves over that to add to the effect, but I was unable to find them before I left. Still hunting for them!
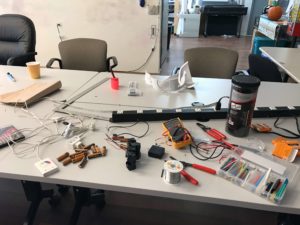
Tools, materials and software used in Version 3.5:
- Tools
- LulzBot Taz3 3D printer with 0.5mm extruder
- Epilog Engraving Laser
- Circular sander
- Soldering iron
- Volt meter
- Hot glue gun
- Caulk gun
- Popsicle sticks (for mixing)
- Mixing cups
- Cotton swabs (for cleaning misapplications)
- Clamps (lots of clamps (can’t get enough))
- Materials
- 3MM white PLA (Inland brand)
- Clear cast acrylic sheeting (1/4th inch) (from Inventables)
- Solder
- Hot glue
- Black silicone (should be adhesive, I accidentally purchased flexible silicone, will touch on that later)
- Superglue (regular super glue)
- Two part epoxy
- Bondo All-Purpose Putty
- “XTC-3D” 3D part smoother epoxy (fancy epoxy really, but it works)
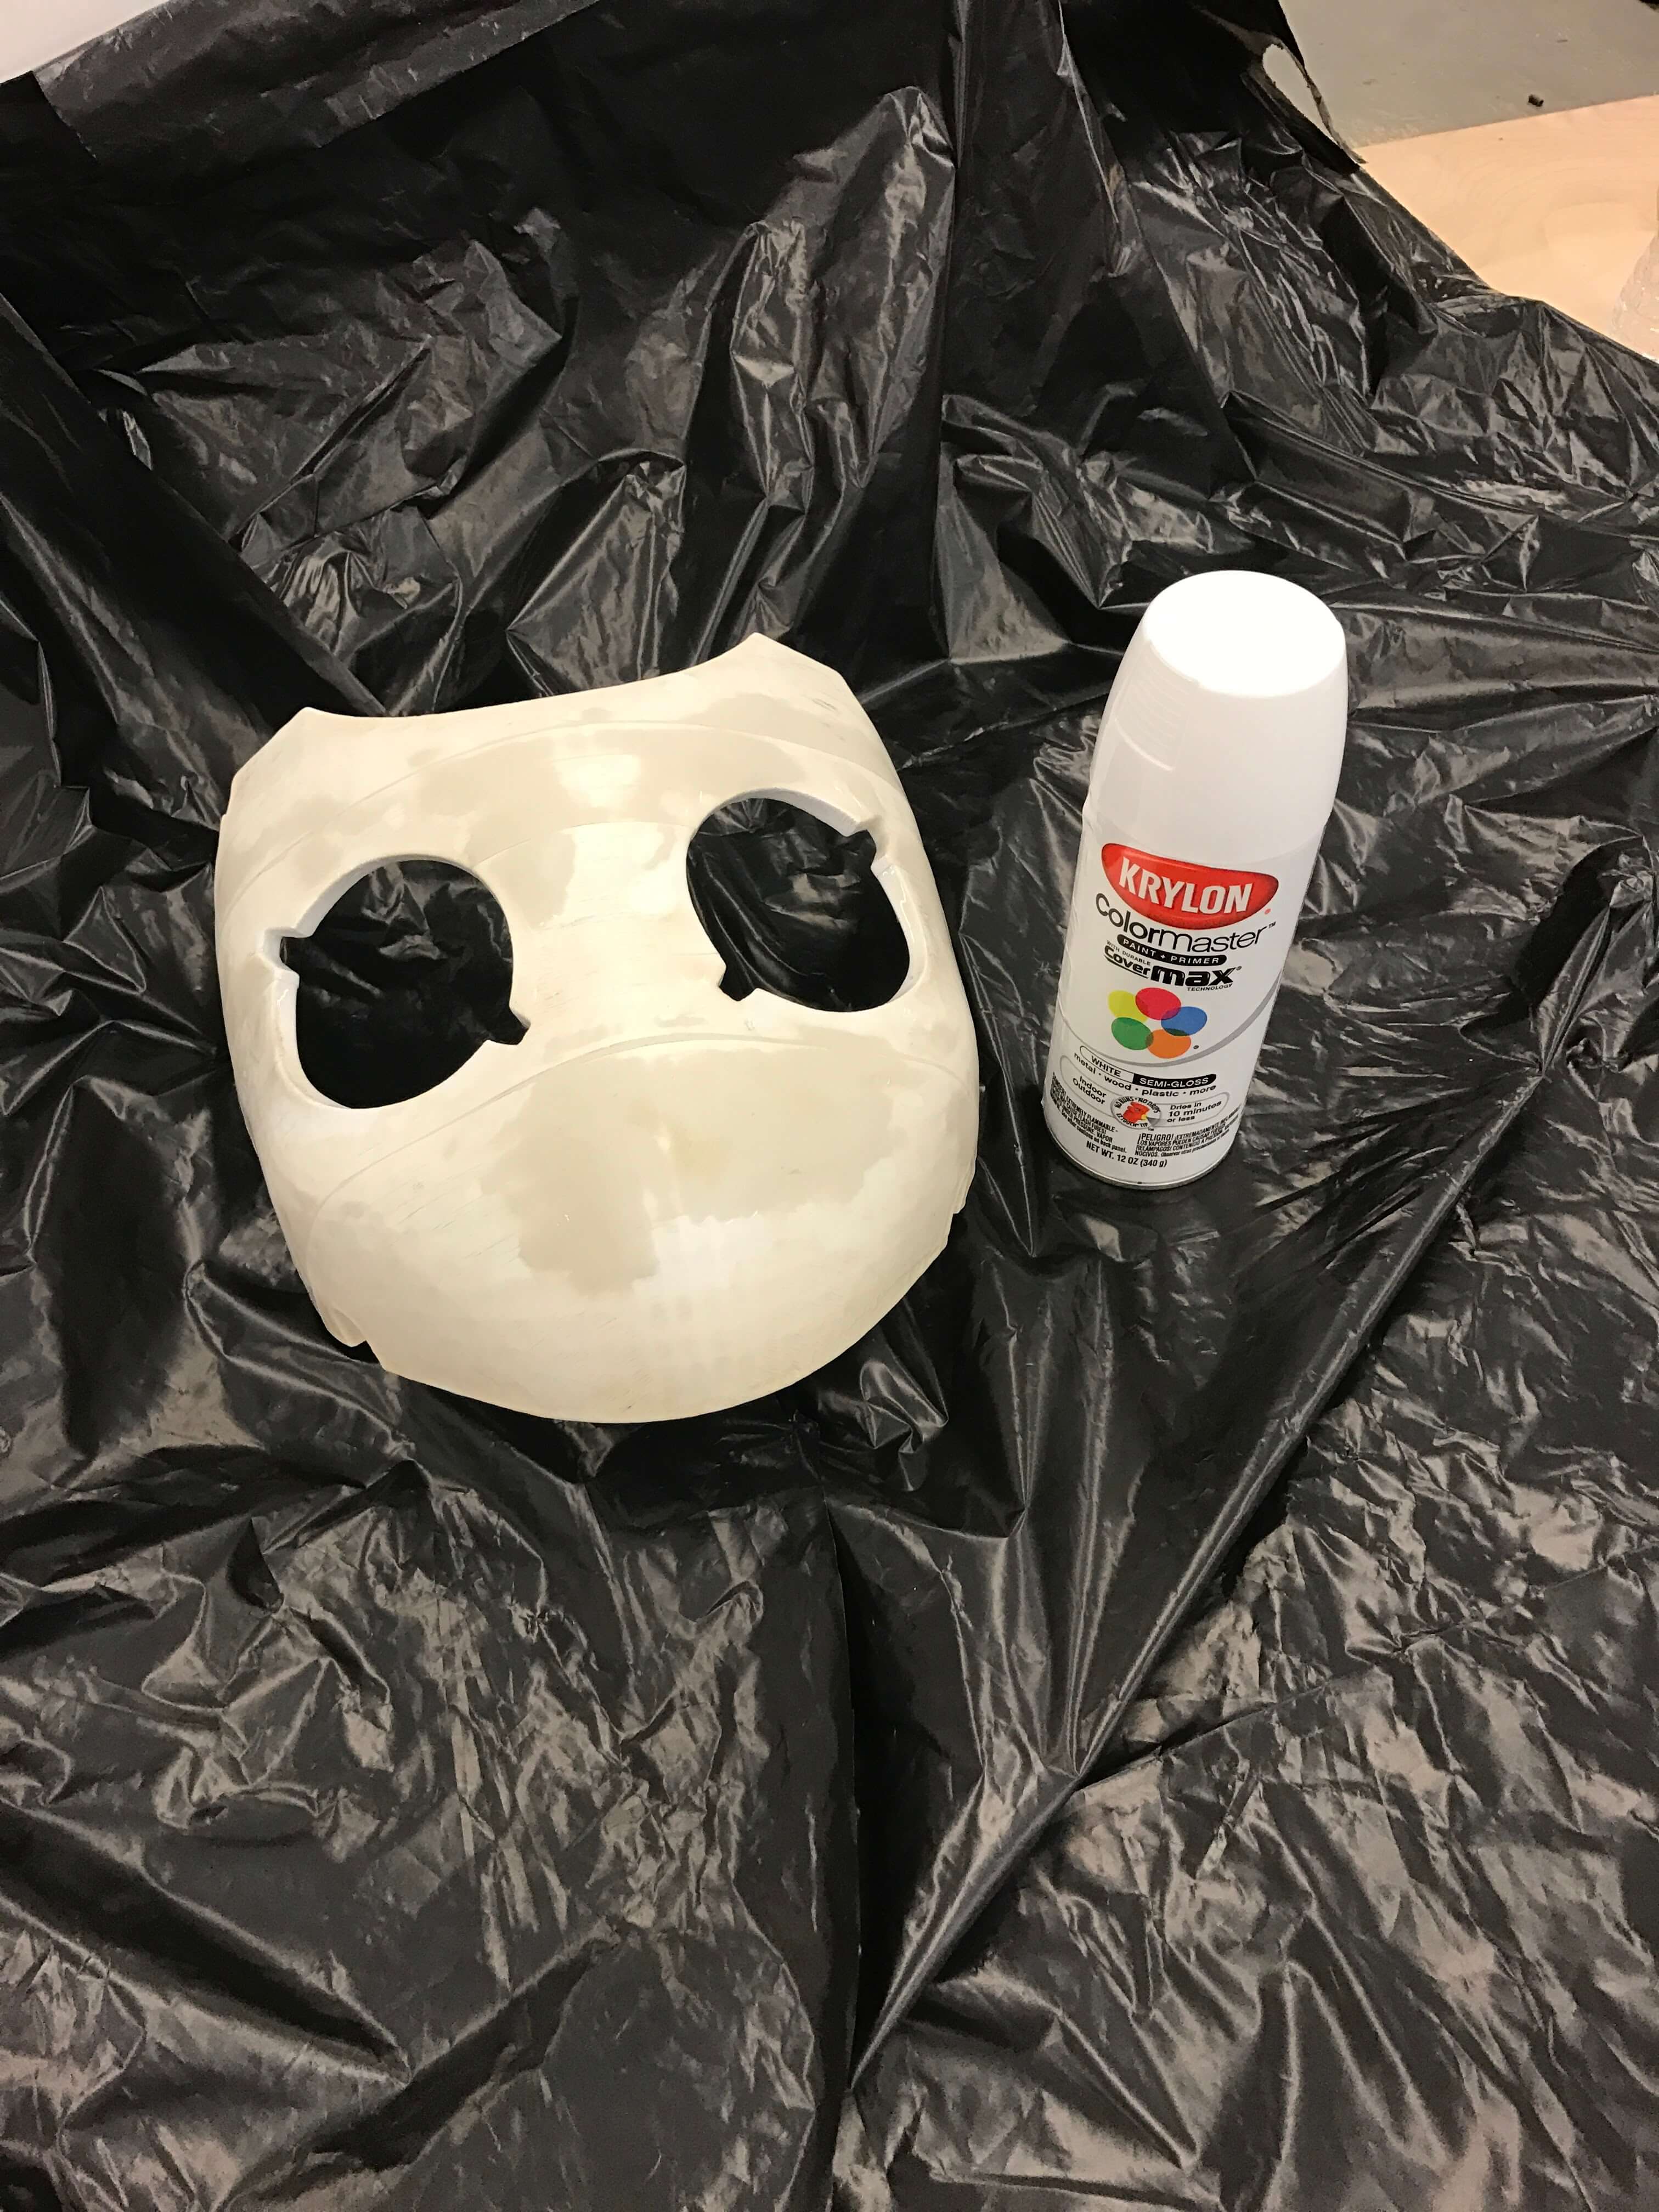
- Krylon White Semi-Gloss Dual Paint & Primer
- Krylon High-Gloss UV-Resistant Clear Coating
- DAP Dynaflex 230 10.1 oz. Premium Indoor/Outdoor Sealant (INCORRECT PRODUCT TO USE!)
- Hot glue (a lot of hot glue)
- IKEA DIODER flexible strip with controller
- “AA” battery holders
- 8 “AA” batteries
- Heat-shrink tubing
- High-Density Foam Tape for insulating doors
- Whiteout
- Software
- Repiter-Host (for the Taz3)
- Slic3r
- Metasequoia 3D
- Maya
- Netfabb
- Illustrator
A general walkthrough in creating the mask:
The mask started with discovering a 3D model that @ByNEET had created and released. The model was basically a replica of the 3D model in the show. It was originally created in Metasequoia, so I had to download a trial and convert the file to .OBJ for increased compatibility. From here, my friend Faraday (whose contact info is above in the post) disassembled the face plate and forehead from the model for conversion to STL. I used Slic3r to scale the parts up and Netfabb to clean and then break them into smaller chunks for 3d printing. Unfortunately we didn’t have any printers large enough to do one big print.
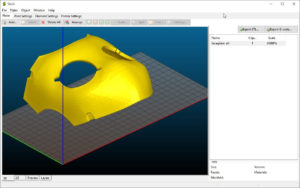
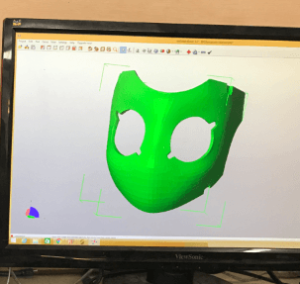
Once I had files I could actually feed to the slicing software, I used Repiter-Host with Slic3r to actually slice the files into g-code from the printer. After some trial and error, I got 6 excellent quality PLA pieces that needed to be assembled. It probably took over 20 hours to print all 6 pieces over a week of nightly printing. I ended up printing the PLA at 200C with a 0.28mm layer thickness. At higher temps I frequently had over-extrusion issues on the Taz. As I mentioned earlier, I went with PLA because it produced more consistent results with considerably less warping and virtually no over-extrusion affecting the smoothness of the layers.
I aligned and glued the pieces together with super glue (very carefully) and let them dry overnight. I then filled any excess spacing with epoxy. The superglue was just to get everything set in place, and the epoxy was to help make a lasting and slightly flexible bond to support the superglue. The final assembled 3D prints had very minimal unevenness. I took the mask home and started applying Bondo to it very lightly to help smooth the mask further. I originally chose Bondo because it was not too difficult to work with, but in the future I’m going to see if I can get away with using XTC-3D exclusively, because the Bondo risks making an uneven surface, even if it is completely flat. It’s much easier to work with XTC-3D due to its lower viscosity, although there may be other epoxies that work just as well.
At this point, since this is version 3, I attempted to fiberglass it. I’m going to jump over this part since it didn’t turn out as expected. I may revisit the idea for other props in the future, but for this specific application it was inappropriate. I suppose you don’t need fiberglass if the print itself ends up being the base.
After ripping the fibreglass off, I picked the mask up again as version 3.5. I sanded some of the fiberglass resin off and took it back to PS1 where I cleaned it up and applied XTC-3D epoxy for smoothing 3D prints. Its really just a fancy epoxy, but it does a good job of smoothing and is fairly priced.
By the way, ALWAYS use gloves when dealing with epoxy, and use a smock, or clothes you don’t like. I learned this the moderately hard way. I am determined to not learn it again. Also, use a fine filter mask when sanding down epoxy. You really don’t want to breathe it in.

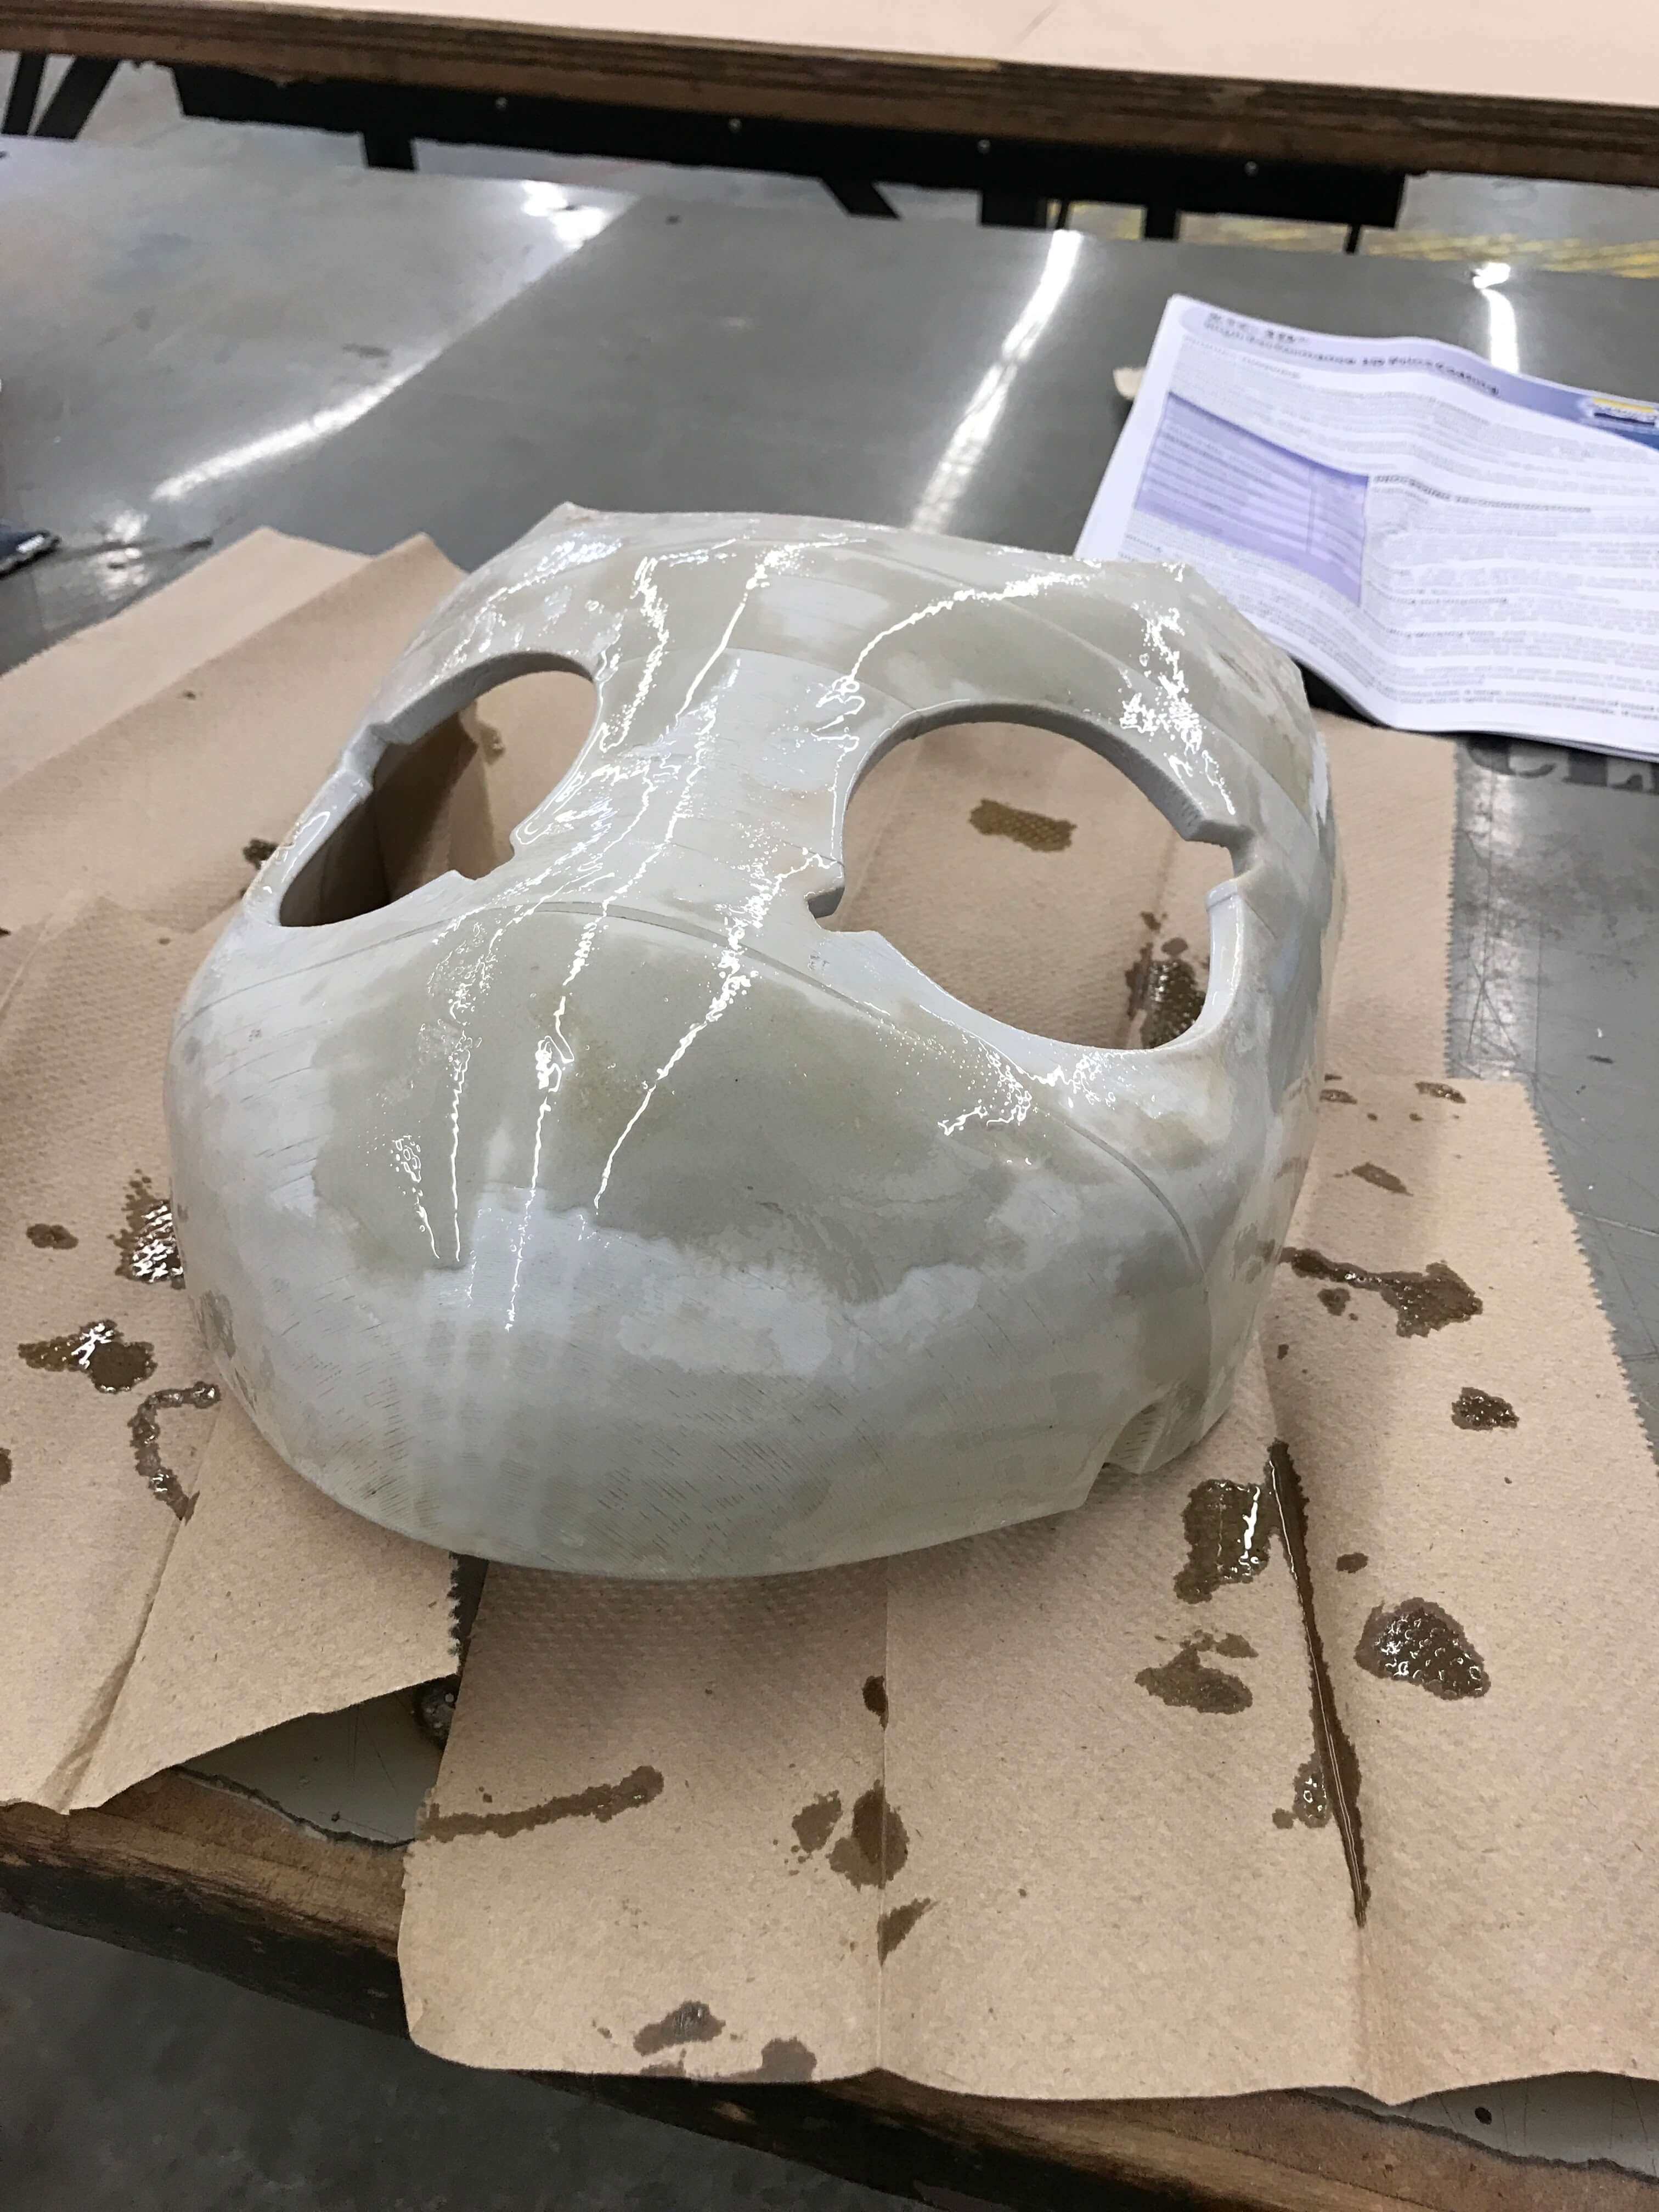
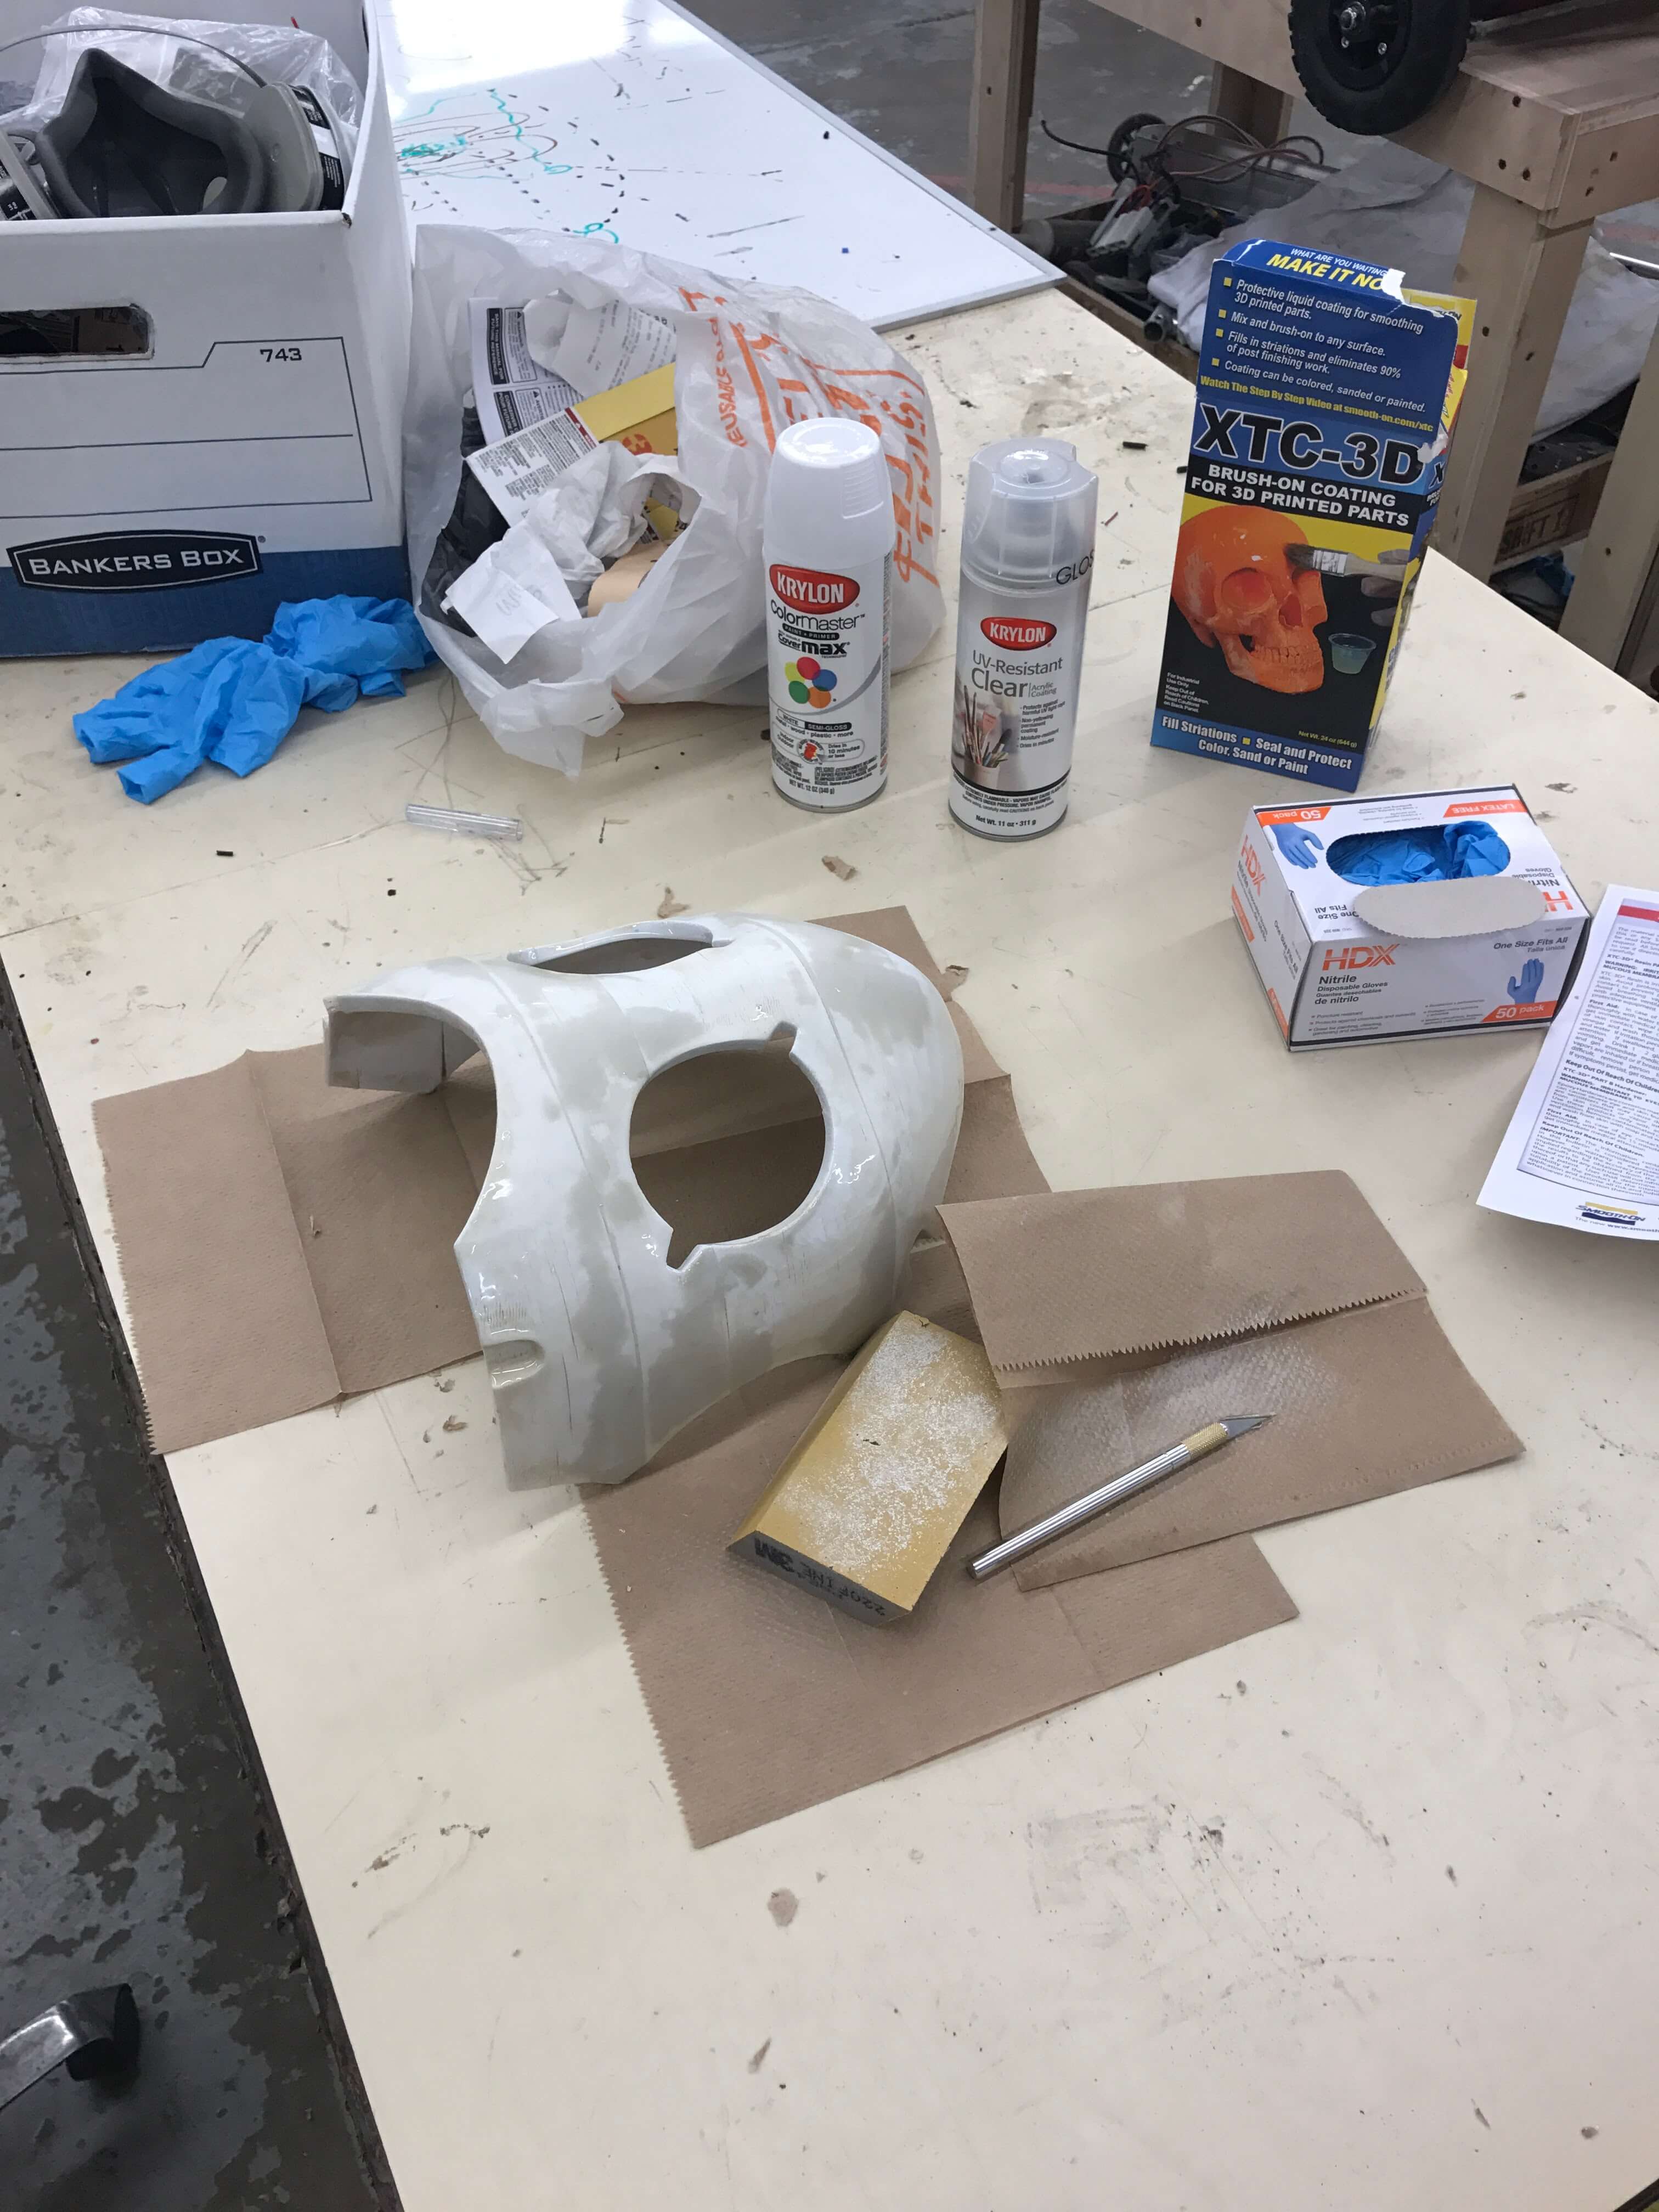
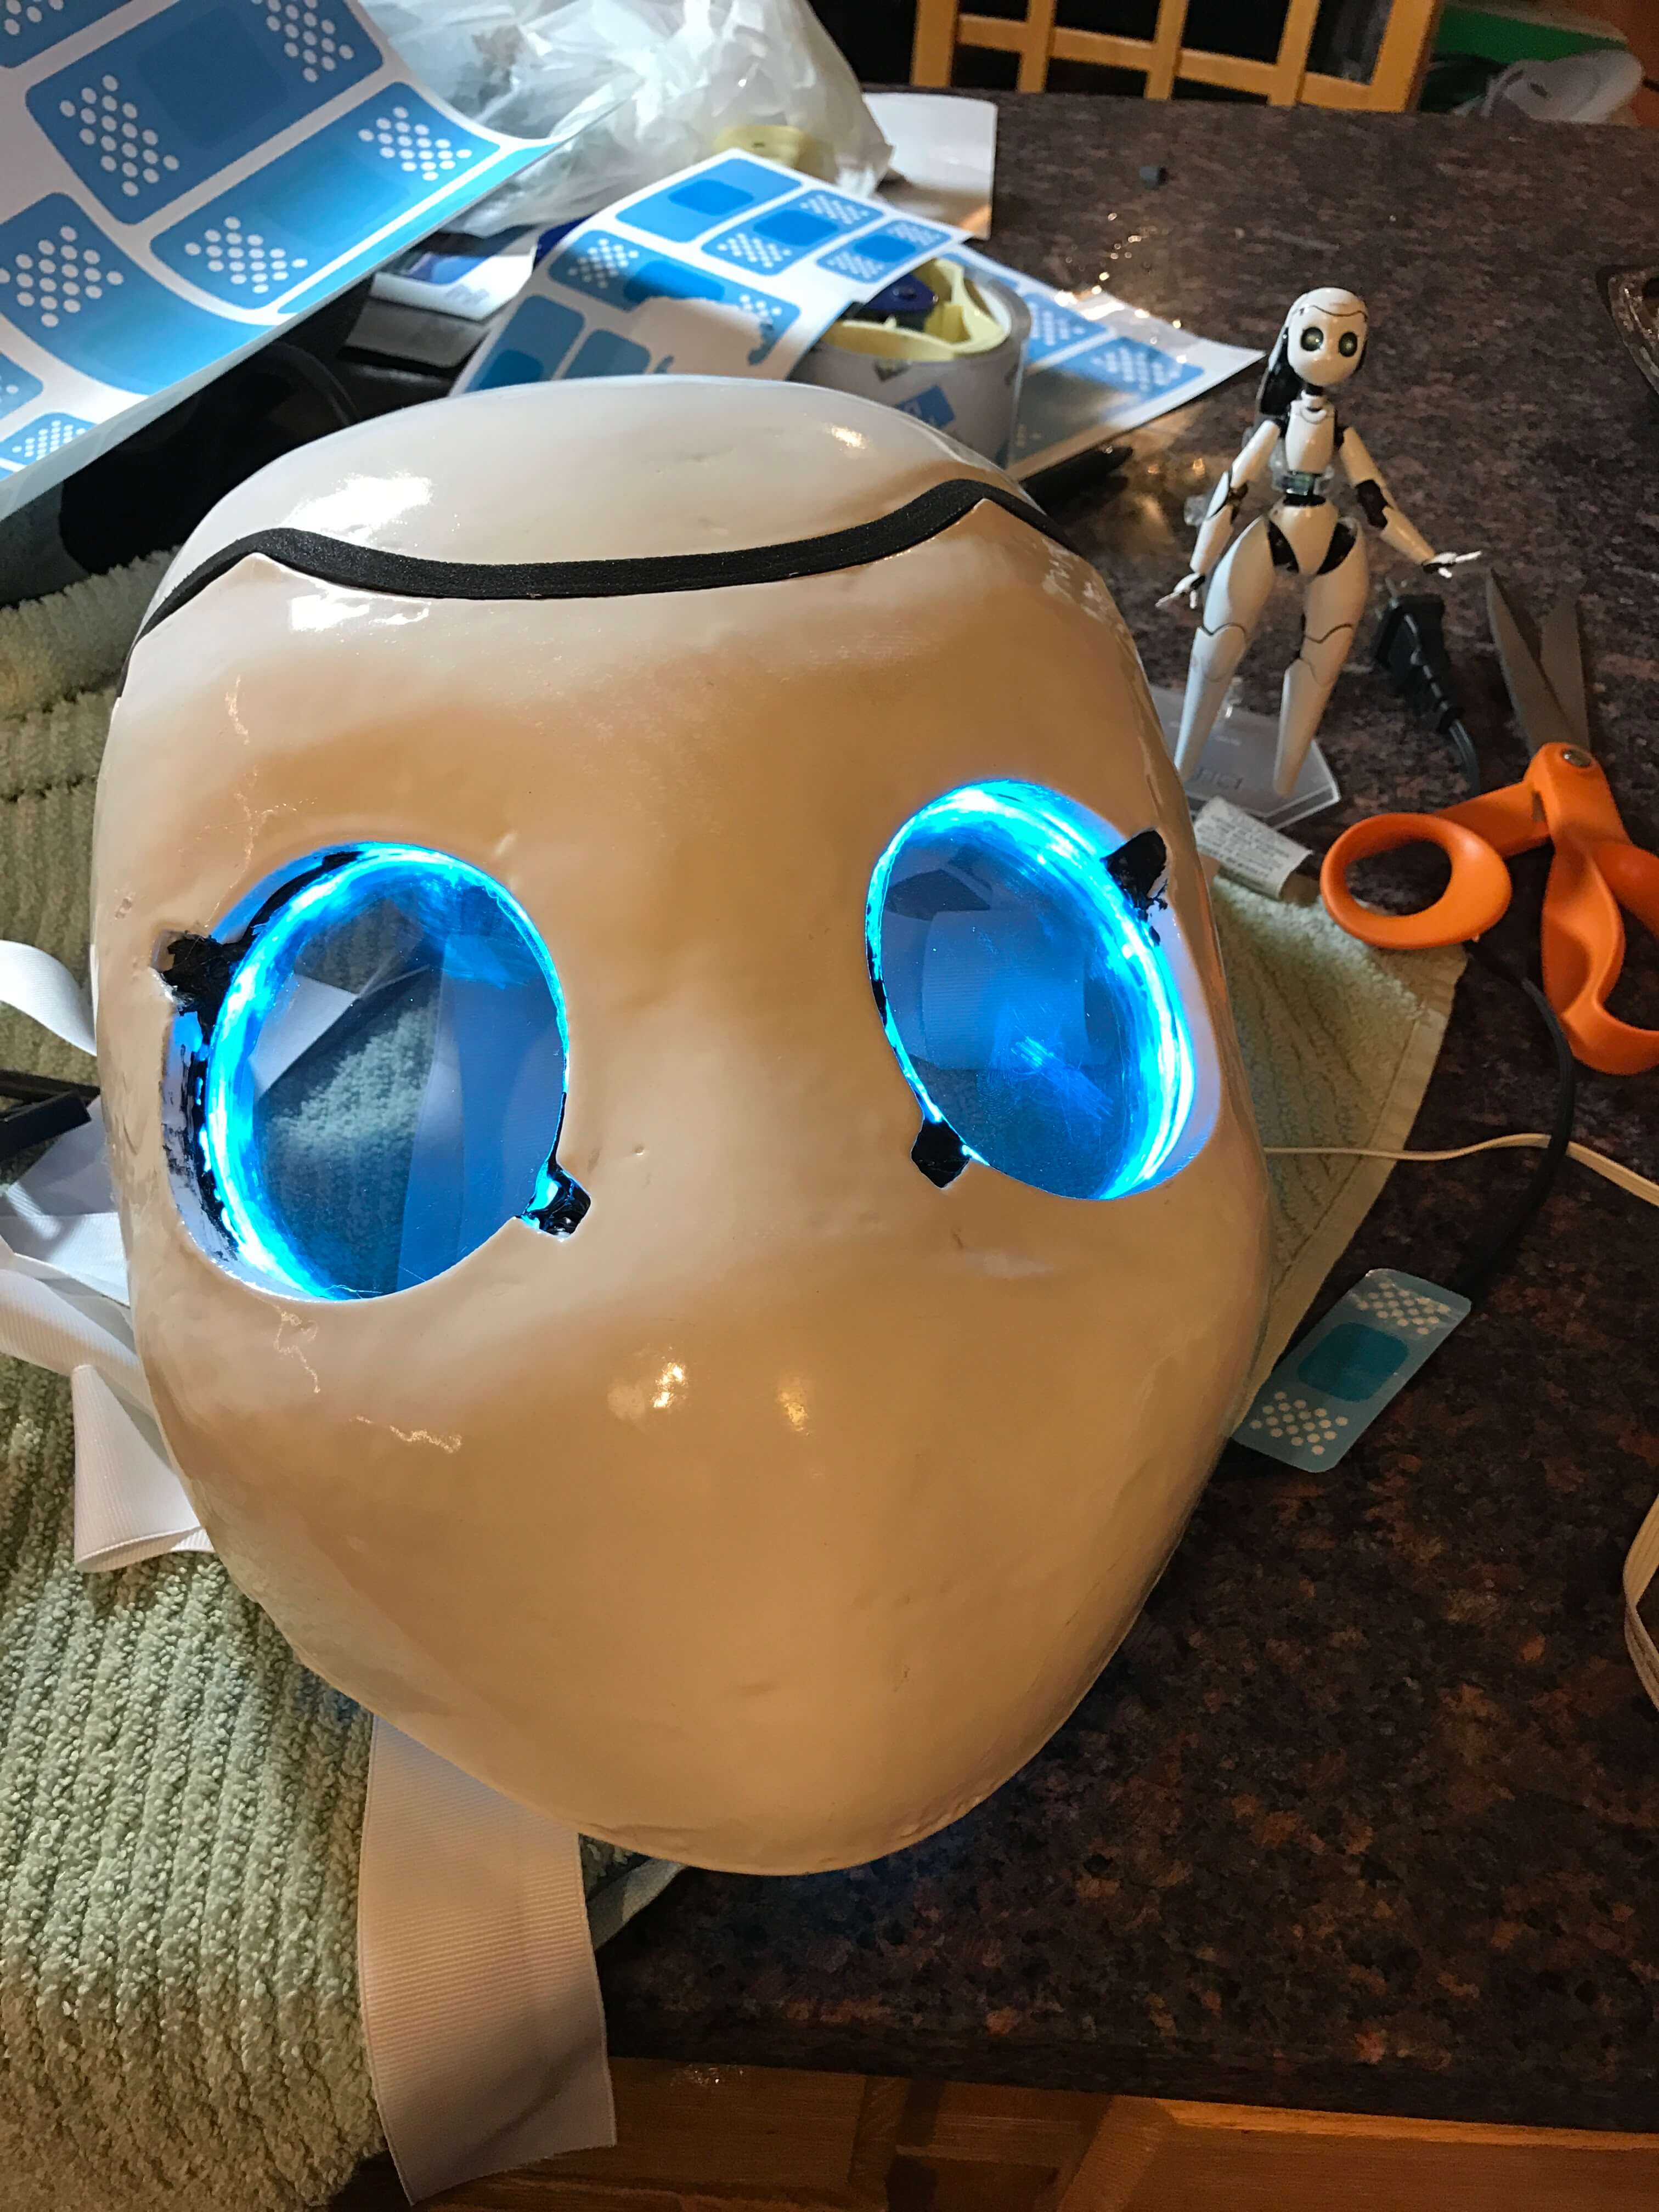
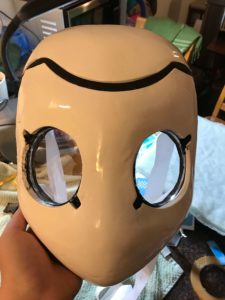
I applied 3 layers of XTC-3D in an attempt to smooth out defects and resin. It ended up coming out fairly nice all things considered. I sanded it a bit more and prepped it for spray painting.
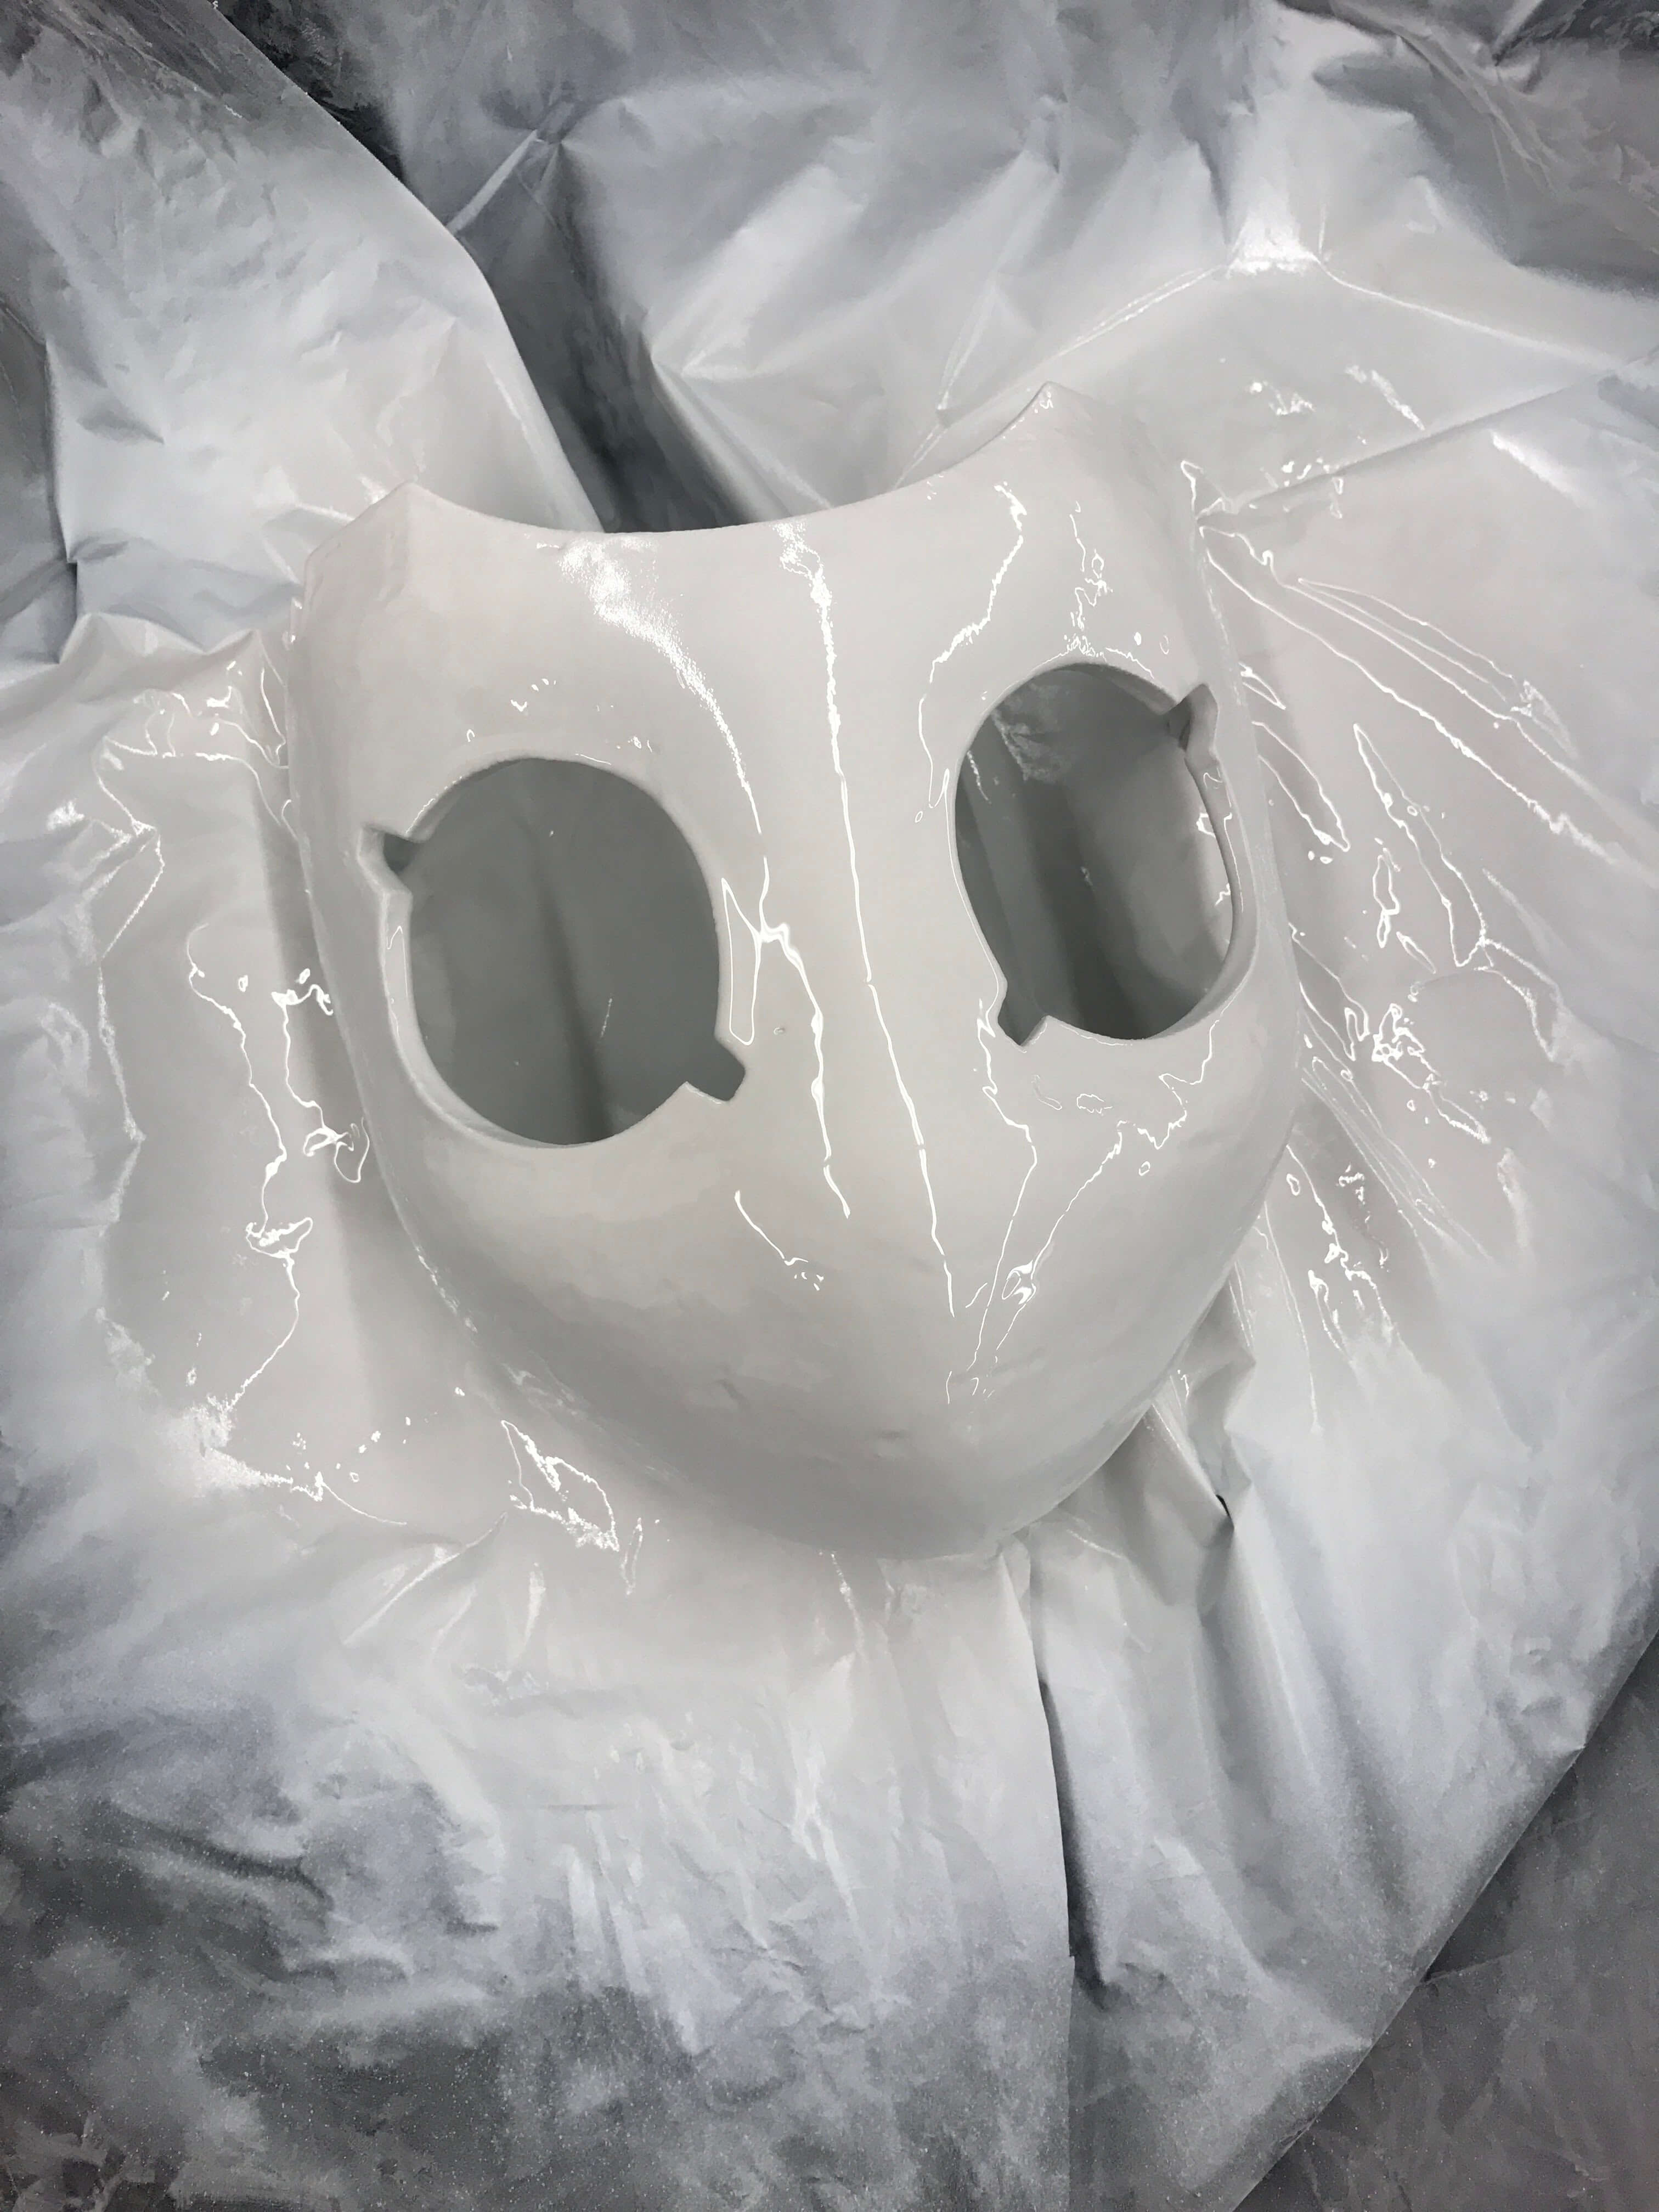
To spray-paint it, I used a couple layers of “Krylon White Semi-Gloss Dual Paint & Primer” and then clear coated it with two layers of “Krylon High-Gloss UV-Resistant Clear Coating“. The paint plus primer was a faster alternative to priming and painting individually, since the surface underneath was already mostly neutral colors. With a protective high gloss clear coat added, I was able to achieve the level of gloss I wanted. Note: I wore a protective mask during this process, along with gloves. Safety first!
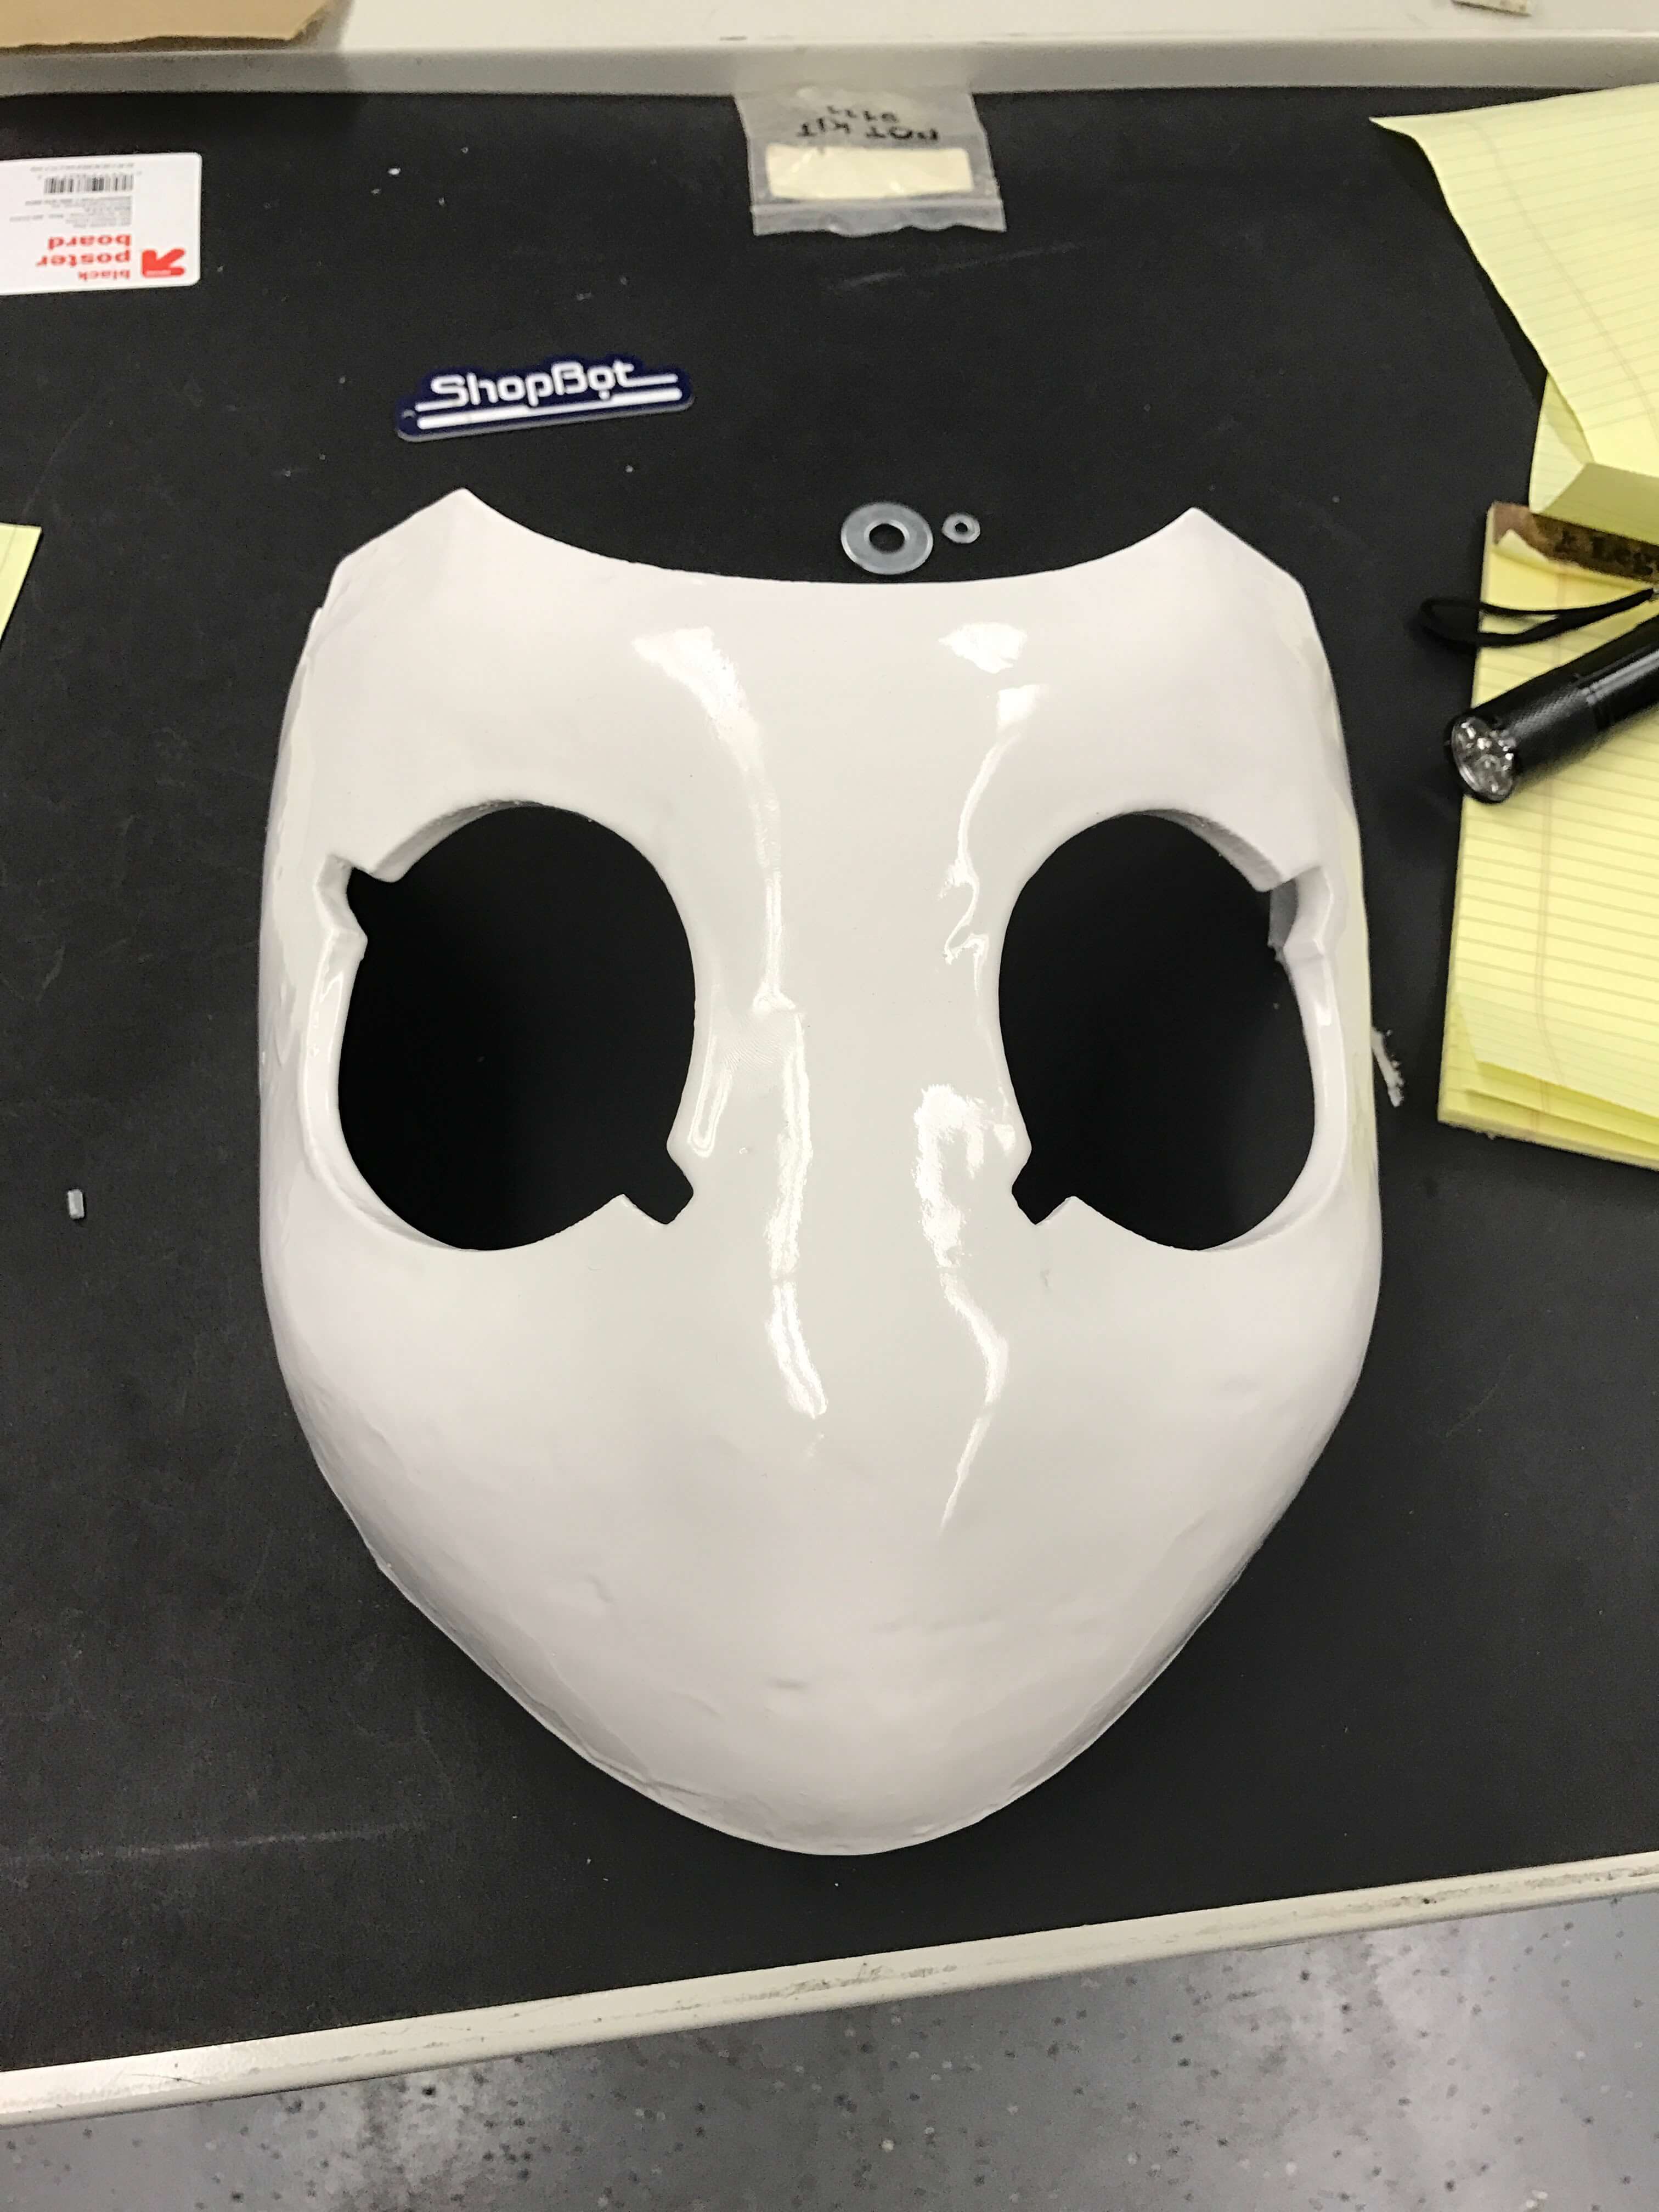
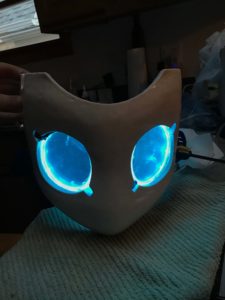
After successfully painting it, I took measurements to cut the eyes out on the laser. I estimated the size of the acrylic I’d need by taking measurements and the narrowest and widest sections of the eyes. It wasn’t the most accurate measurement method, but it did achieve the desired results. I used multiple layers of acrylic that was held together by epoxy in order to create the lights. It improved visibility by preventing light leakage in the direction of my face and into the mask itself. I then sealed the acrylic into the mask itself with a lot of black silicone (originally intended to block light AND act as an adhesive) and a lot of hot glue (to support the flexible silicone). During this process I also took the time to adhere fabric clips with epoxy. These would be used to attach the mask to the straps holding it to my head.

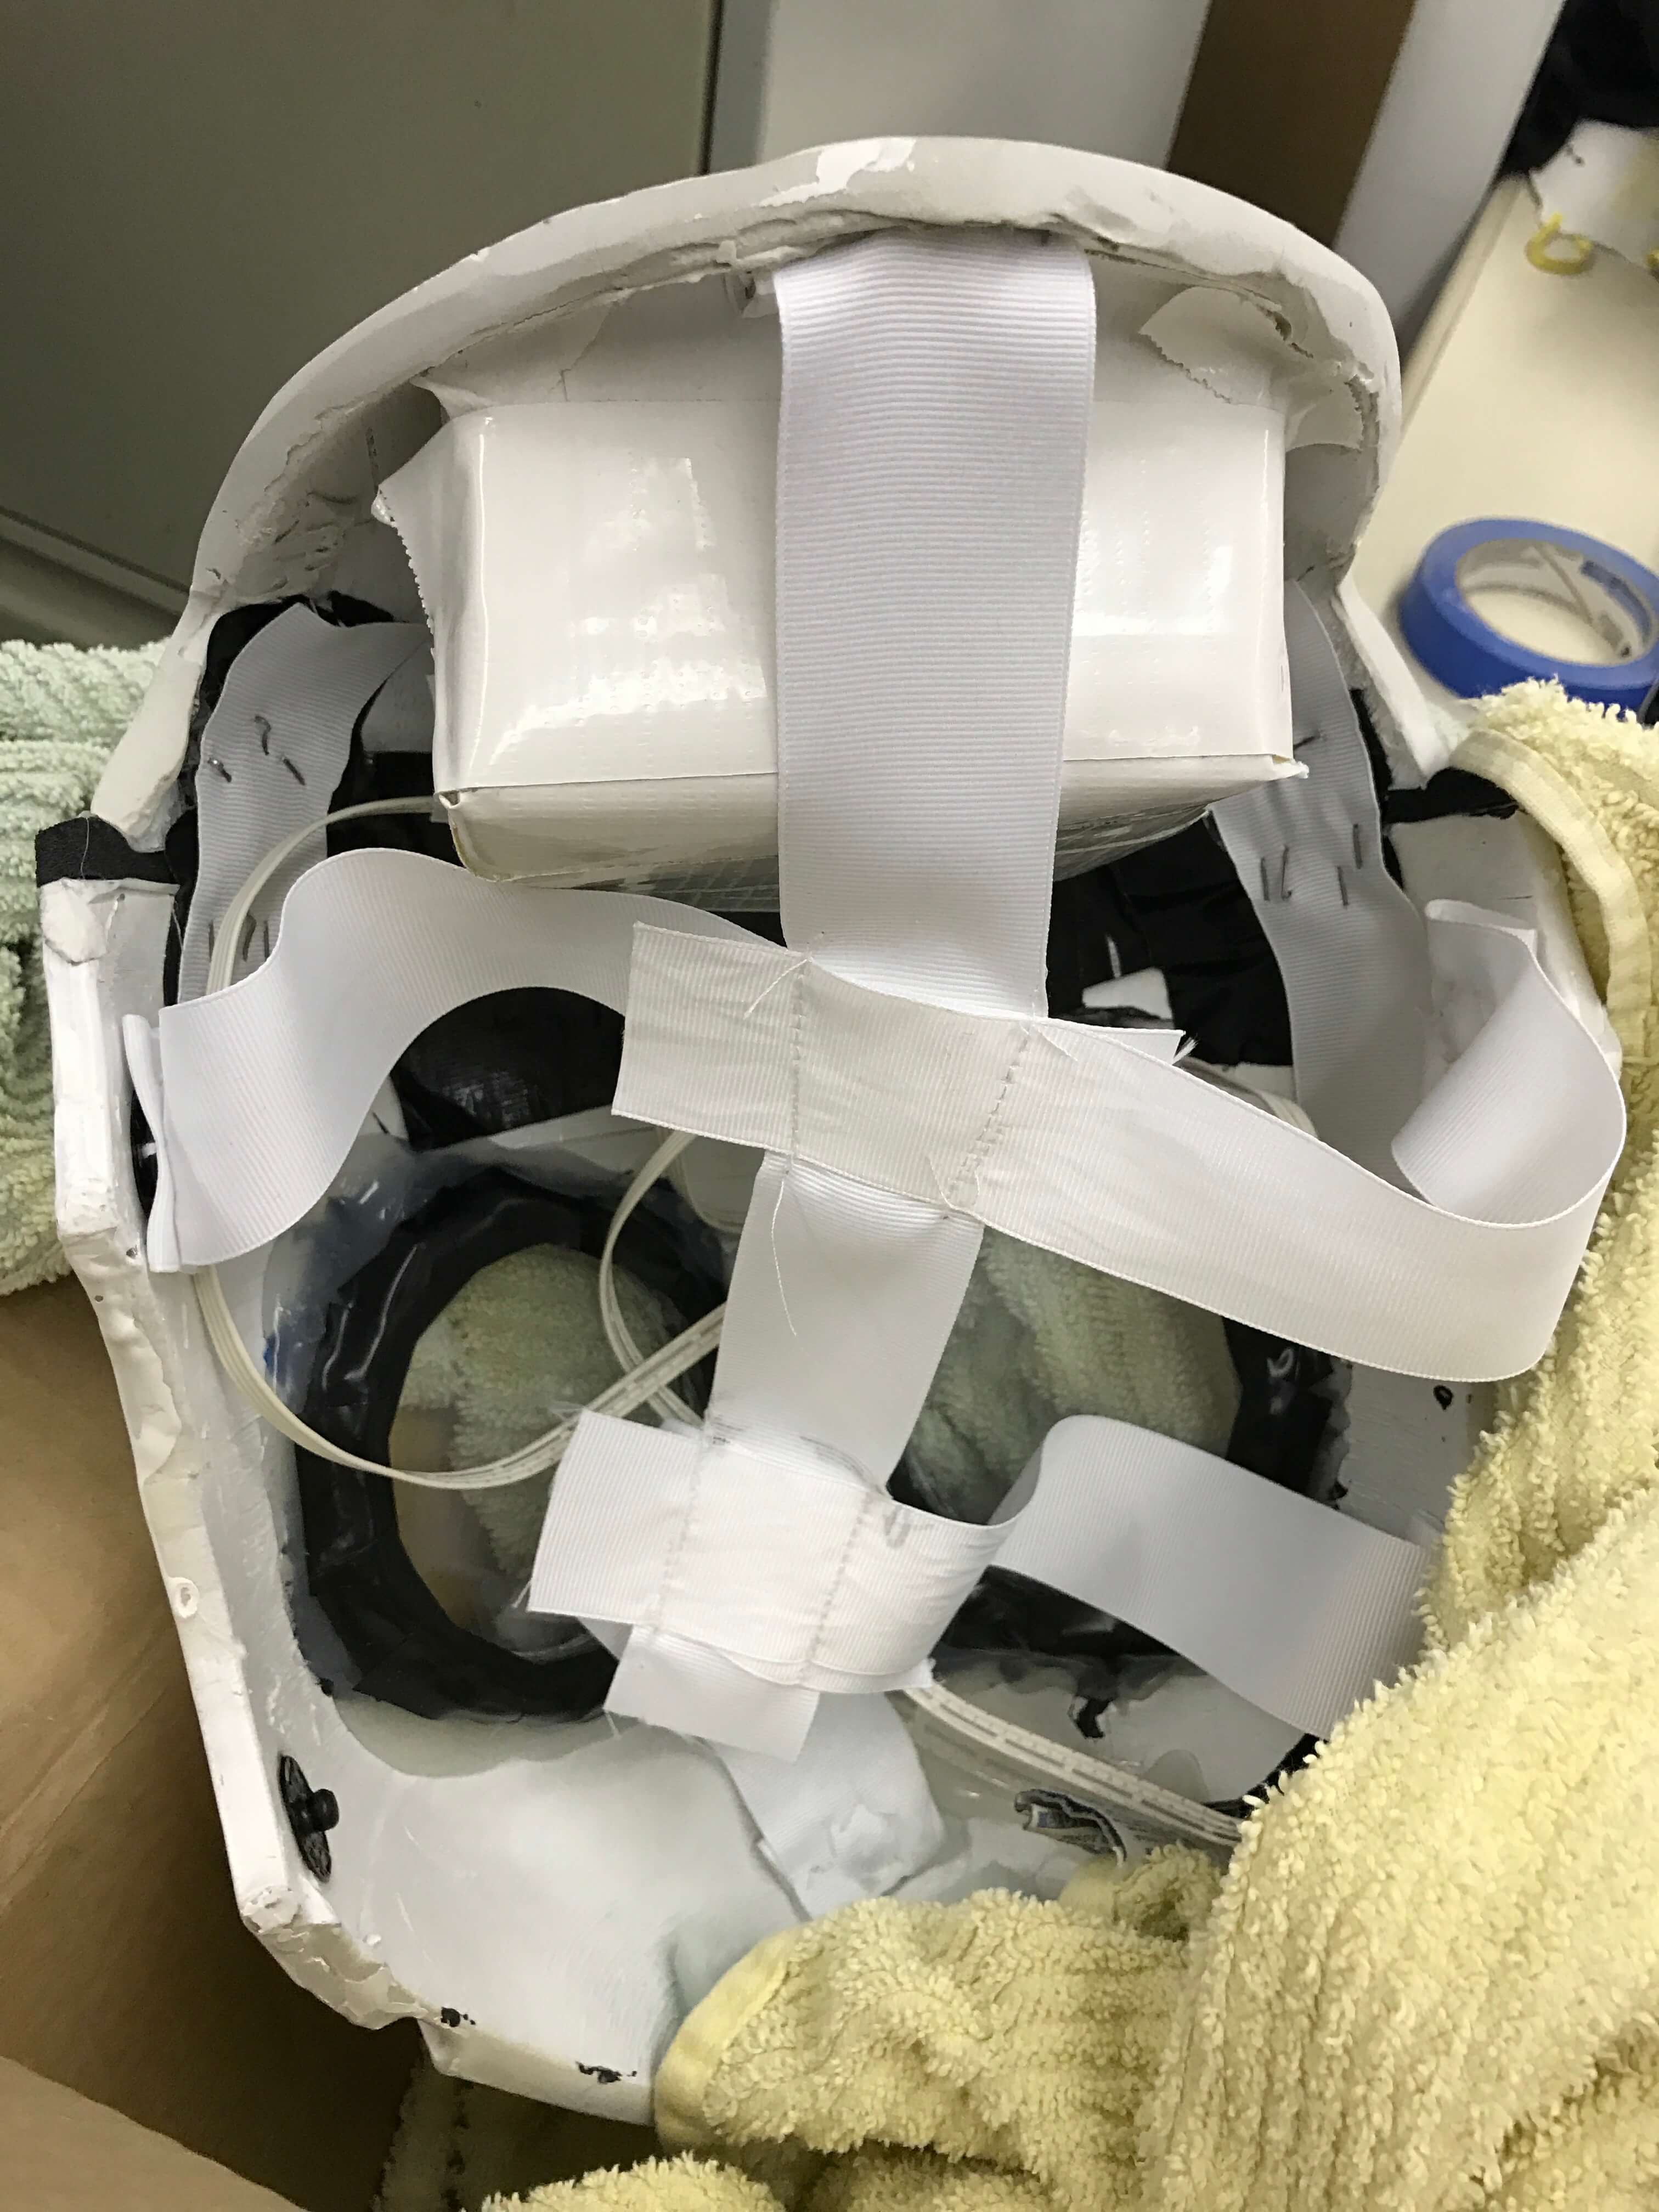
The LED flexible strip was simply wrapped around both lenses and came out looking pretty good! I then assembled the two halves using door insulation strips, fabric, fabric tape, and a staple gun. I hacked it together under a time constraint with my mom (who, thank goodness, is a professional in the world of sewing) and all things considered we got the mask to securely hold together. The mask was held to my head by 5 interconnected straps, four of which attached to the contact points on four sides of the mask. The fifth attached to the forehead piece with staples. It made it pretty easy to put on and take off. The only addition to the mask was a 4 inch thick block of foam inside of the forehead to raise the mask up on my face, and to add some foam for the bridge of my nose. These were attached with hot glue.
Side note: The mask was originally supposed to use two way acrylic mirrors in the eyes, but lacking the time to test, I ended up going with the MorphSuit mask to hide my eyes instead. It worked pretty effectively, but I plan to test the two way mirrored acrylic soon!

One complete robot mask! I used whiteout to touch up some damage the mask incurred while being moved. It fit on my head quite snugly. In fact, too snug. I found out that I couldn’t breathe in it when I got to the con! I plan to add some sort of air cooling and/or liquid cooling to the mask so that I don’t die of heat stroke, and the lenses don’t fog up. I was able to do limited photo shoots in it, but it’s rather unbearable with the hoodie.
Now for the electronics:
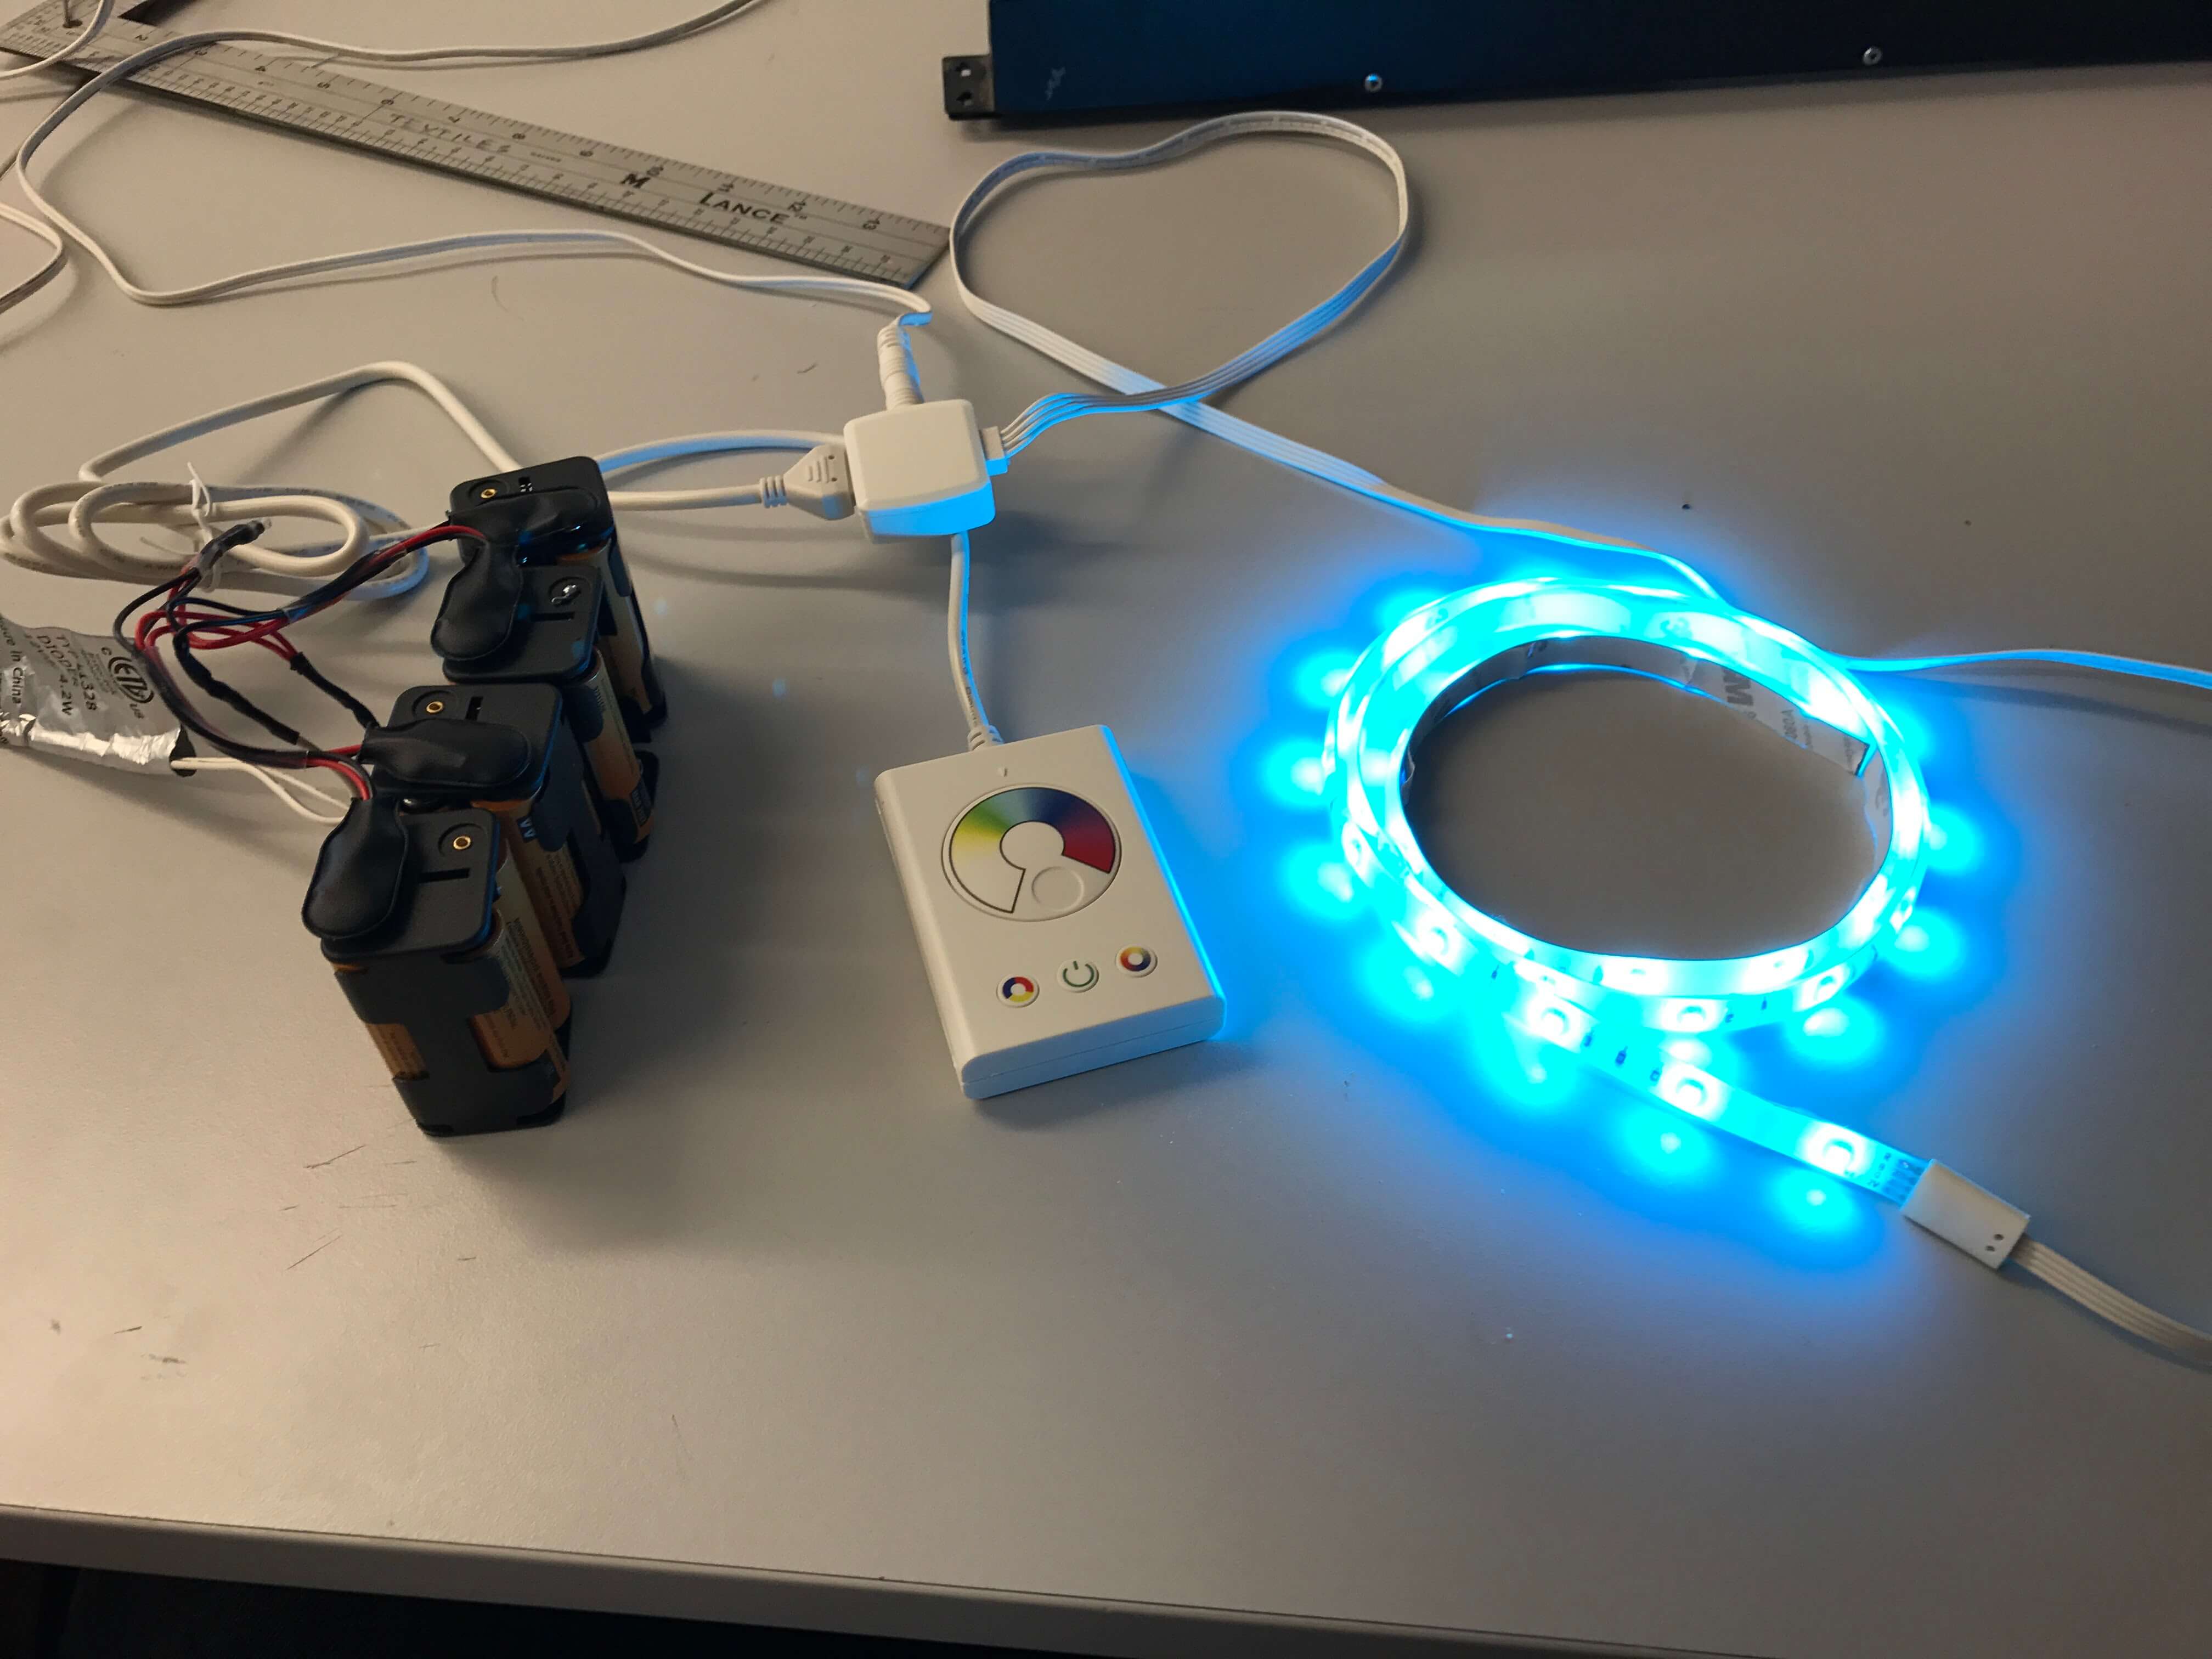
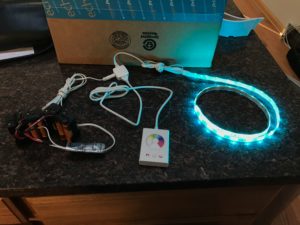
The IKEA DIODER strip required 12V, and due to time constraints, I simply wired up a AA battery pack to provide about 12V, two sets of four batteries in parallel. I simply carried it in my backpack. I hope to redesign this to use rechargeable cells that can last a significant amount of time, although I haven’t had to replace the batteries in this yet. Eventually I would like to replace this with an Arduino powered flexible LED strip with much cleaner wiring. I’d also probably add some glove buttons so that I could change the colors on demand from either red, to rainbow, or others.
In summary:
This was my first major project at PS1 and despite the many setbacks I came across, I persevered and completed it! However, the project isn’t truly over, as I’d like to not only create a cleaner version of the mask with everything I’ve learned, but I’d like to make the entire suit. It’s quite a daunting task, but I’m learning Fusion 360 and hope to have a pretty decent draft soon.
I hope this guide inspires and benefits anyone else looking to make stuff at PS1! I had a lot of fun making this and I’ll be displaying it at the member meeting tonight (2/28).
I will also be attending Maker Faire in April with the mask on display!
Once again, feel free to reach out with my contact info if you have any questions, or you have your own project and are looking for some input. I’d be happy to offer whatever advice I can.